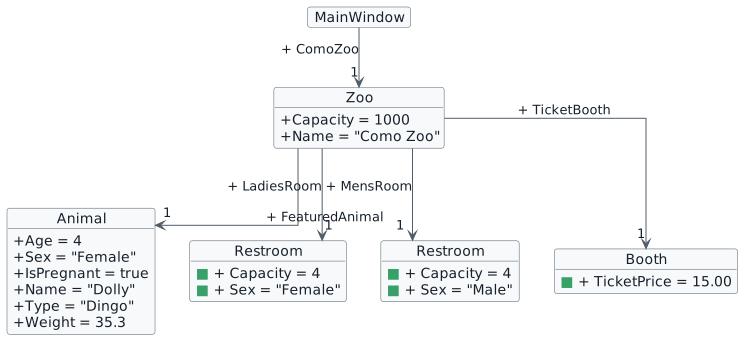
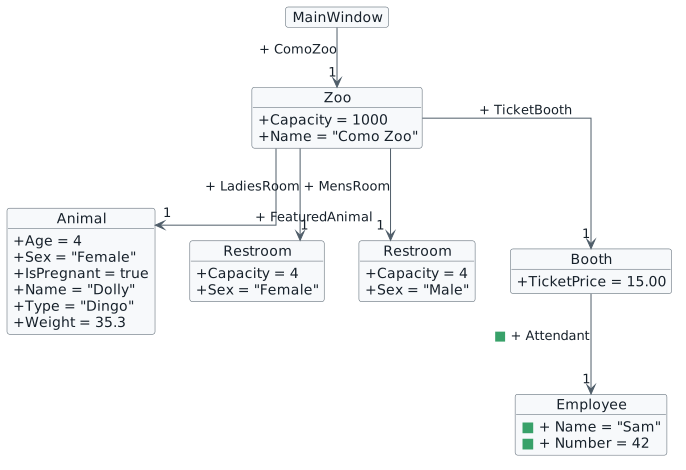
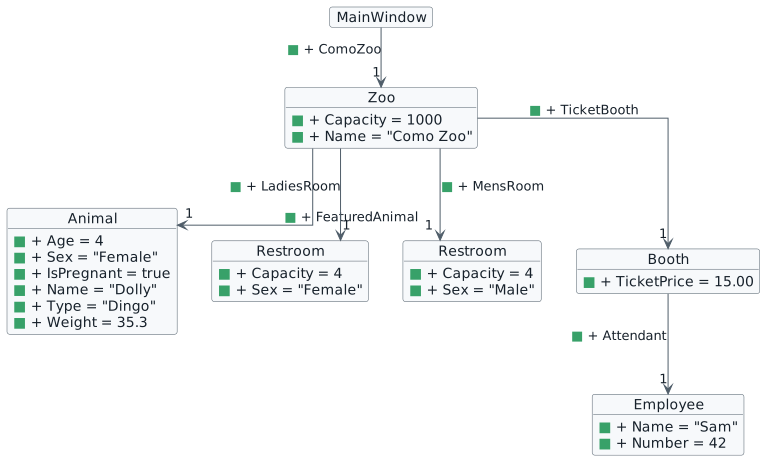
In this activity, you will start from the provided Zoo 1.1 LastName project and complete the first version of the Como Zoo object model.
BUser Story: Como Zoo Starter Program
The manager of Como Zoo has asked for the first version of a program that stores basic zoo information. This version will create the main Como Zoo object and connect it to the first objects the zoo needs to track: a featured animal, restrooms, a ticket booth, and the employee working at the booth.
This checkpoint gives the rest of the project a foundation. Later checkpoints will build on these objects and add more behavior.
CAcceptance Criteria
Details
Create a ComoZoo object.
Store the zoo's name and capacity.
Store a featured animal with its starting information.
Store both a ladies' restroom and a men's restroom.
Store a ticket booth with its ticket price.
Store the employee assigned to the ticket booth.
Run the program and verify the object values with the debugger.
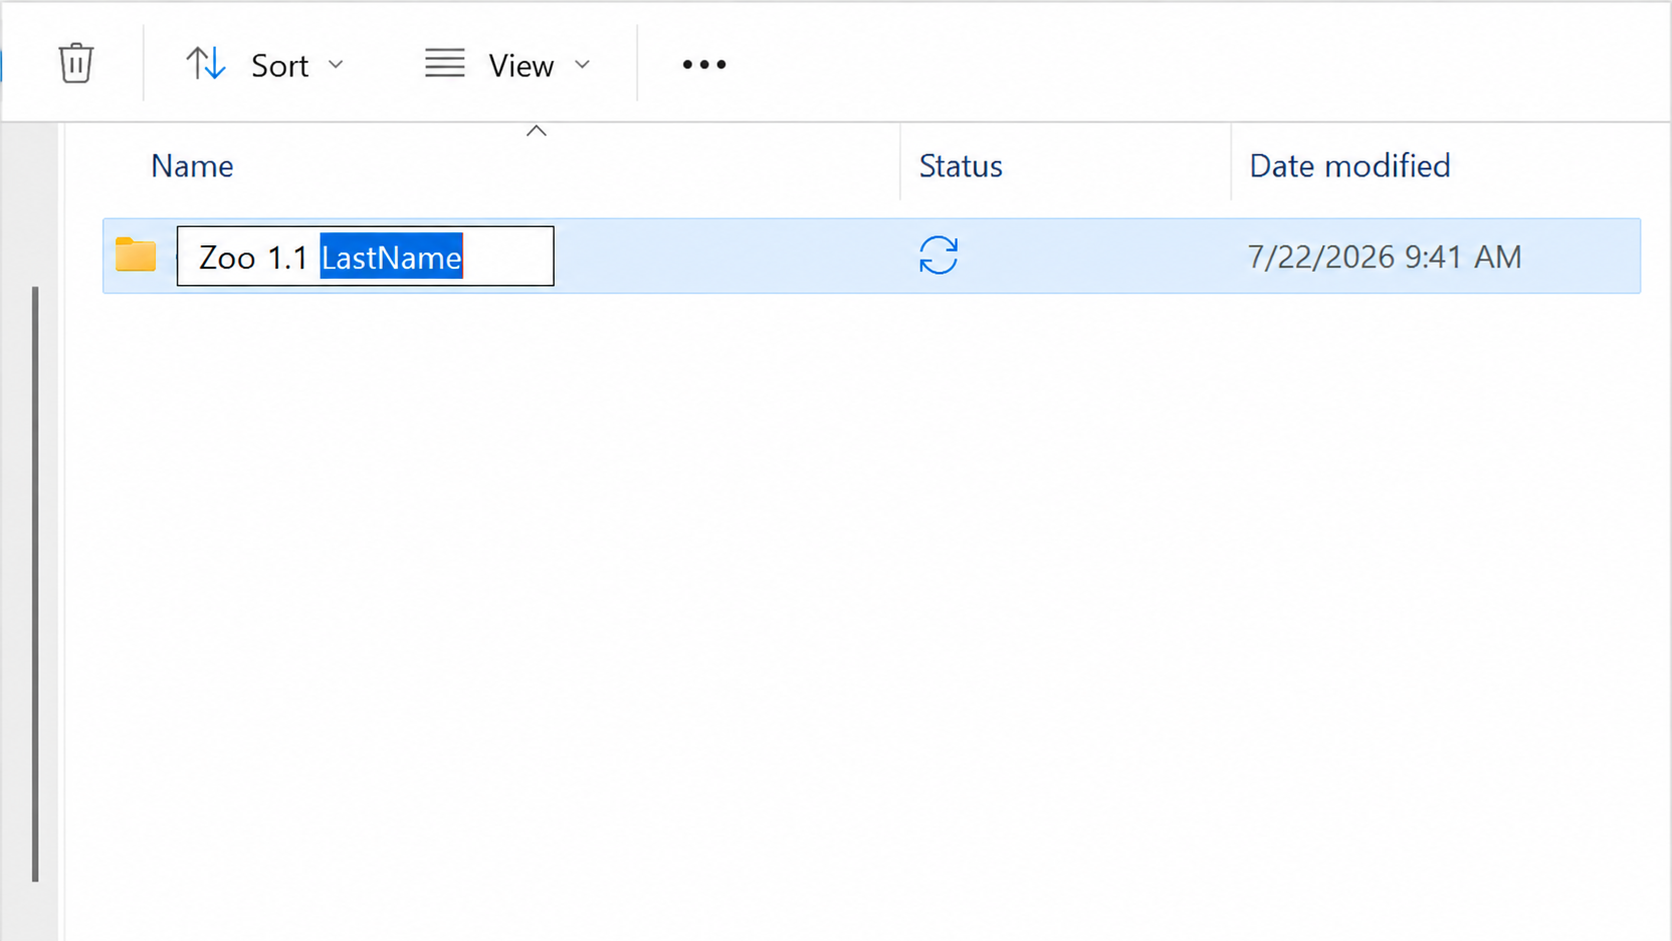
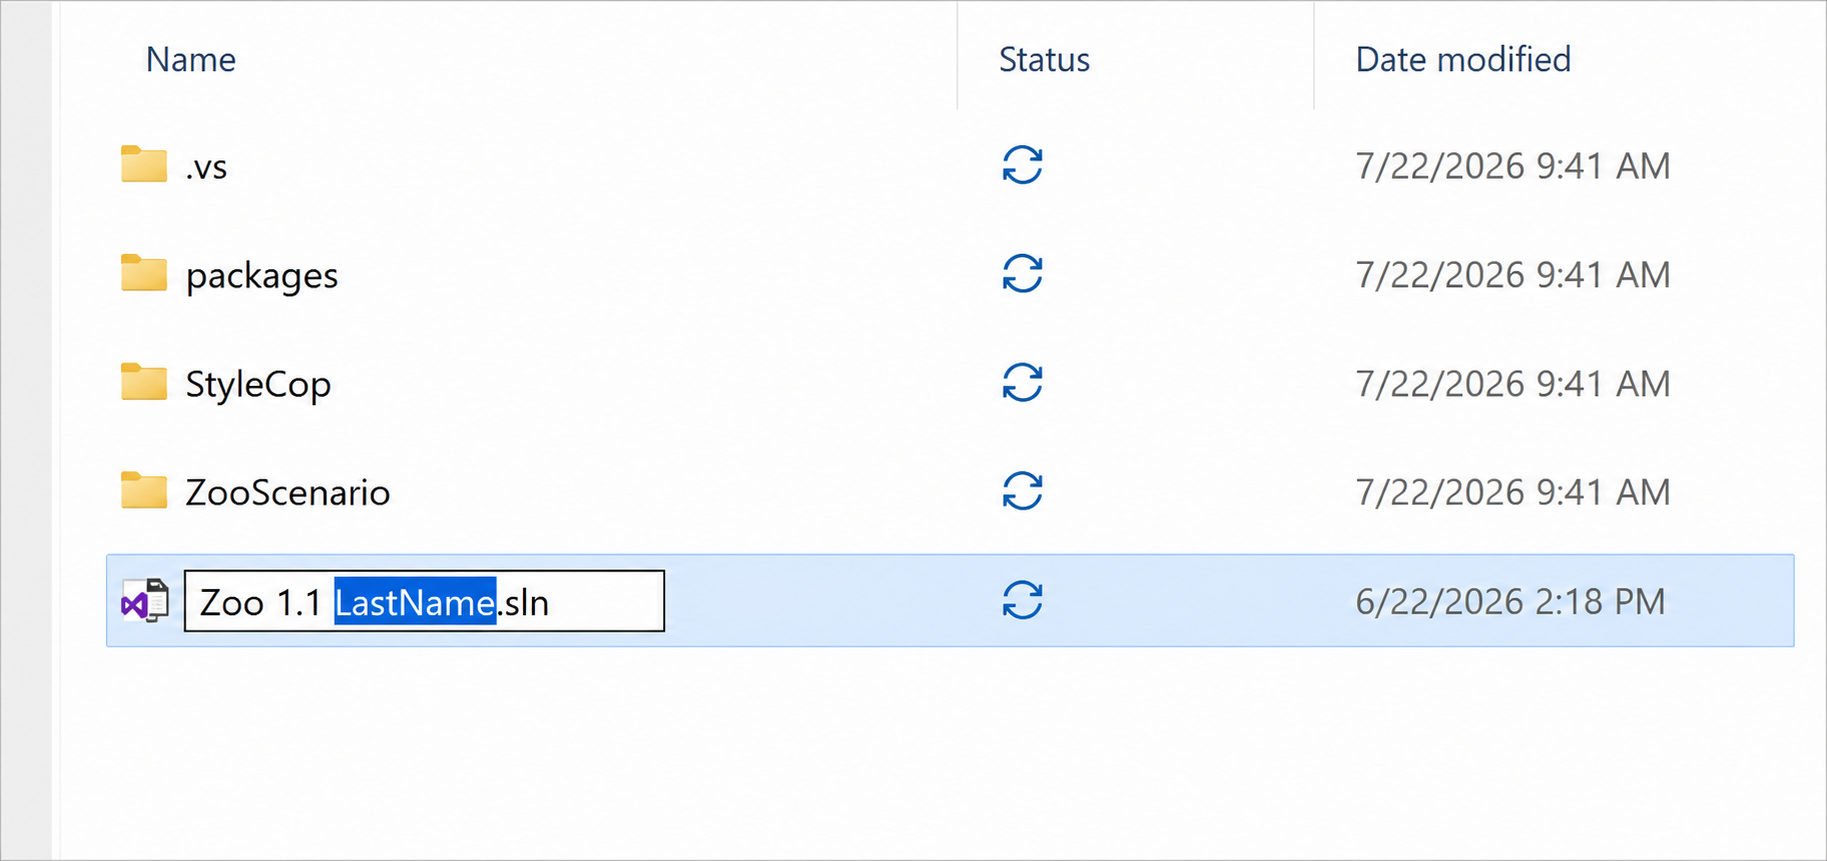
2Rename the parent folder and solution name by replacing LastName with your own last name, if your instructor requires that naming pattern
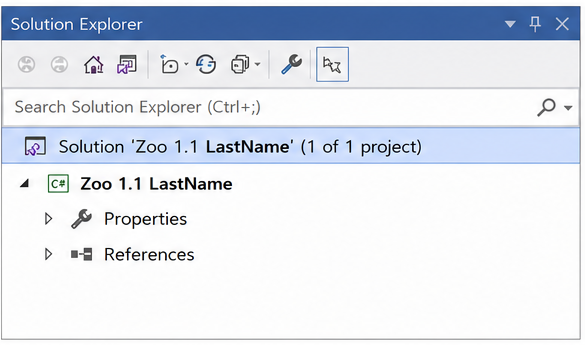
3Open the solution in Visual Studio
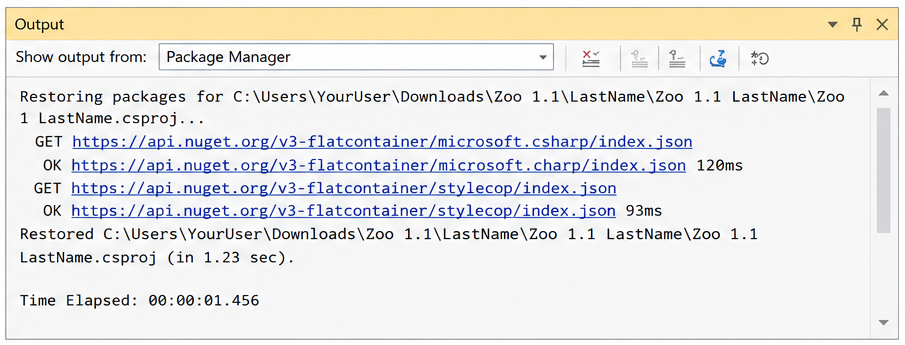
4If Visual Studio prompts you to restore packages, restore the NuGet packages before you start editing
Rename the extracted project folder by replacing LastName with your own last name.Rename the solution file by replacing LastName with your own last name.Open the solution and confirm that the solution and project names use the required naming pattern.If prompted, restore the NuGet packages and wait for the restore to finish.
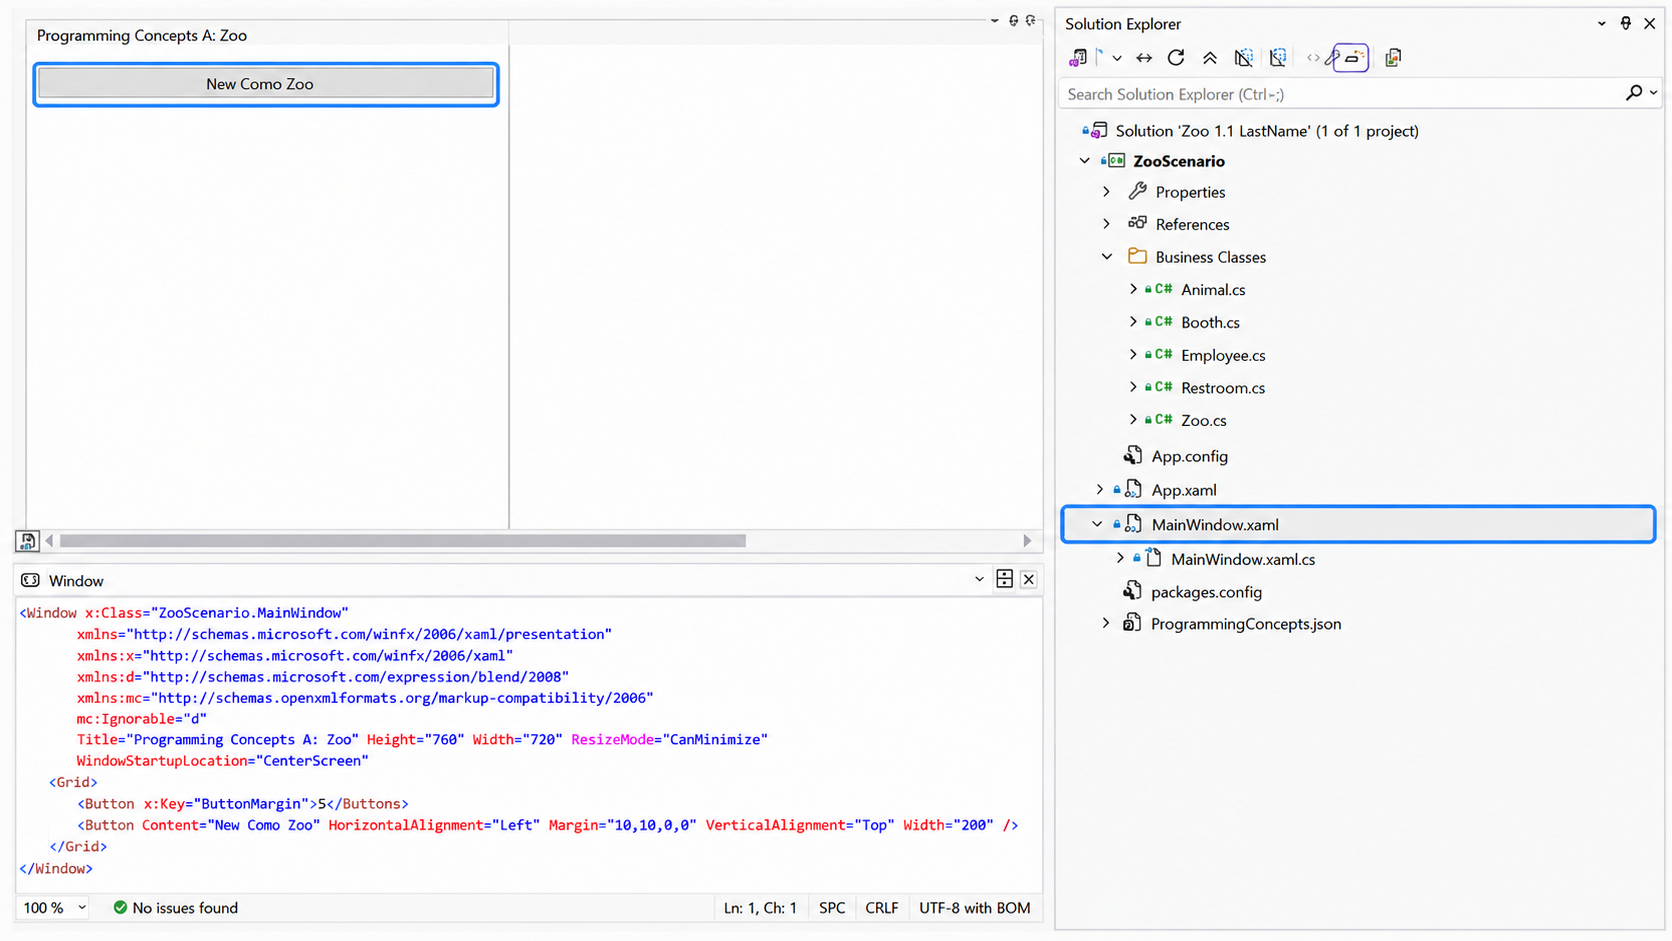
3.Explore the New Como Zoo Event Handler
Double-clicking the button opens its event handler in MainWindow.xaml.cs.
ACheck Your Work
1Open ZooScenario/MainWindow.xaml, locate the New Como Zoo button, and double-click it
2Confirm that Visual Studio opens ZooScenario/MainWindow.xaml.cs and places the cursor inside newComoZooButton_Click
3Click in the gray margin to the left of a line inside the empty event handler. A red breakpoint dot should appear. You can also press F9 to toggle a breakpoint on the current line
4Press F5 (Start Debugging) to run the application
5Click the New Como Zoo button and verify that Visual Studio stops at the breakpoint, even though the event handler does not contain any zoo code yet
6Press F5 (Continue) to continue running the application
7Stop debugging, then choose Debug > Delete All Breakpoints. You can also press Ctrl+Shift+F9 to remove all breakpoints
8Run the application again with F5, click the New Como Zoo button, and confirm that the application continues running without stopping in Visual Studio
4.Instantiate the Como Zoo
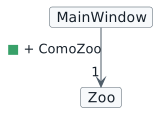
Current object state after this task.
NNew
CChanged
RRemoved
// Create an instance of the Zoo class.this.ComoZoo = newZoo();
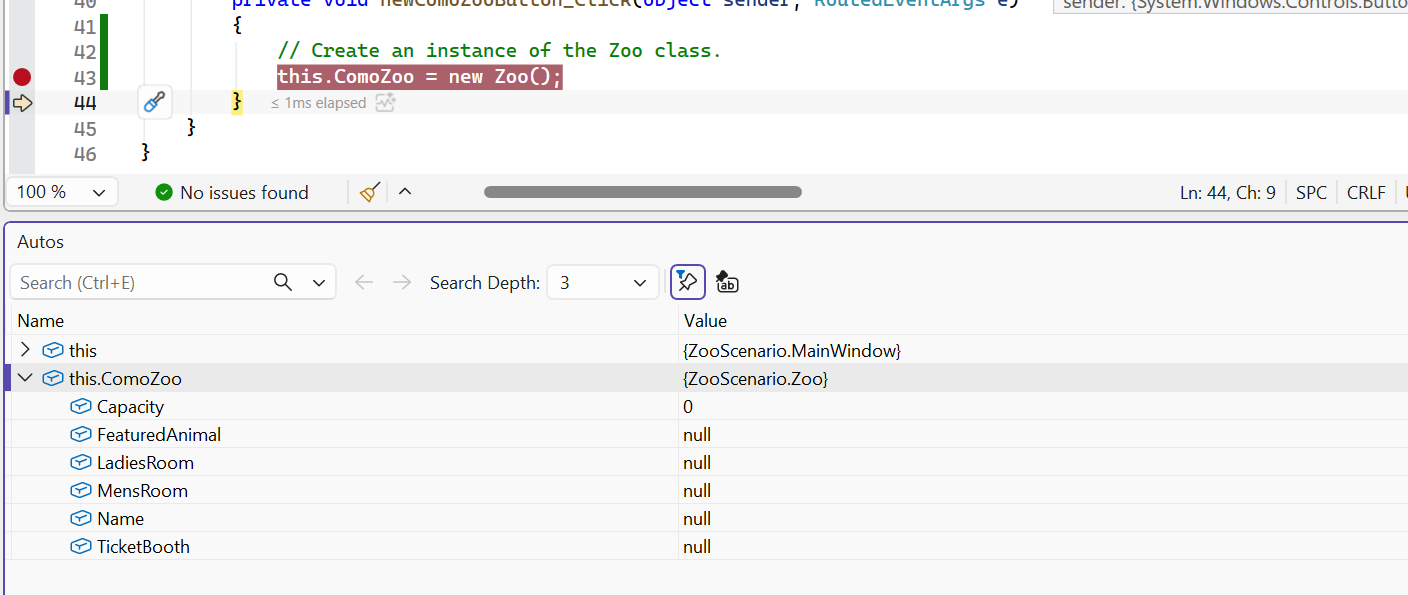
Show where the student should add the Zoo object instantiation inside MainWindow.xaml.cs.Show the breakpoint and the Locals or Watch window after F10 (Step Over), with this.ComoZoo no longer null.
ACheck Your Work
1Open ZooScenario/MainWindow.xaml.cs
2Inside the newComoZooButton_Click event handler, set a breakpoint on this.ComoZoo = new Zoo();
3Start the application by pressing F5 (Start Debugging) or selecting Debug > Start Debugging
4Click the New Como Zoo button
5Verify that Visual Studio stops on the breakpoint
6Press F10 (Step Over) to execute the line, then use the Locals or Watch window to verify that this.ComoZoo is no longer null
7Press F5 (Continue) to continue running the application, then stop debugging before moving on
5.Assign the Como Zoo's Capacity
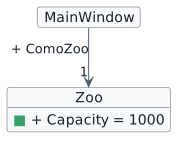
Current object state after this task.
NNew
CChanged
RRemoved
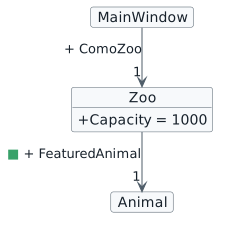
// Assign field values of Como Zoo.this.ComoZoo.Capacity = 1000;
Show this.ComoZoo.Capacity in the Locals or Watch window after the assignment executes.
ACheck Your Work
1Open ZooScenario/MainWindow.xaml.cs
2Inside newComoZooButton_Click, set a breakpoint on this.ComoZoo.Capacity = 1000;
3Start the application with F5 (Start Debugging)
4Click the New Como Zoo button
5When the breakpoint is reached, inspect this.ComoZoo.Capacity. It should still show its previous/default value before the line executes
6Press F10 (Step Over) to execute the capacity assignment
7Inspect this.ComoZoo.Capacity again and verify that it now contains 1000
BTry the Error Intentionally
1Stop debugging and place // at the beginning of this.ComoZoo = new Zoo(); so that line is temporarily commented out
2Set a breakpoint on this.ComoZoo.Capacity = 1000; in ZooScenario/MainWindow.xaml.cs
3Start the application with F5 and click the New Como Zoo button
4When execution reaches the capacity line, inspect this.ComoZoo and confirm that it is null
5Press F10 (Step Over). Observe the null-reference error because the program tried to use a Zoo object that was never created
6Stop debugging and remove the // from this.ComoZoo = new Zoo();
7Run the application again and confirm that the capacity assignment now executes successfully
6.Create the Featured Animal
Current object state after this task.
NNew
CChanged
RRemoved
// Create the featured animal.this.ComoZoo.FeaturedAnimal = newAnimal();
ACheck Your Work
1Open ZooScenario/MainWindow.xaml.cs
2Inside newComoZooButton_Click, set a breakpoint on this.ComoZoo.FeaturedAnimal = new Animal();
3Start the application with F5 (Start Debugging)
4Click the New Como Zoo button
5When the breakpoint is reached, inspect this.ComoZoo.FeaturedAnimal. It should be null before the line executes
6Press F10 (Step Over) to execute the line
7Inspect this.ComoZoo.FeaturedAnimal again and verify that it changed from null to an Animal object
7.Assign the Como Zoo's Remaining Main Fields
Current object state after this task.
NNew
CChanged
RRemoved
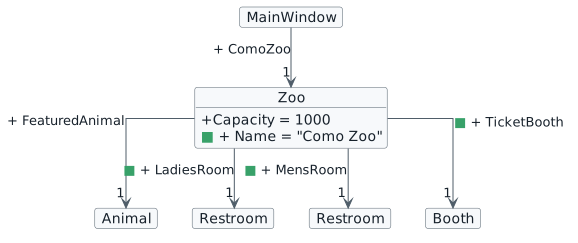
// Create the restrooms.this.ComoZoo.LadiesRoom = newRestroom();
this.ComoZoo.MensRoom = newRestroom();
// Assign the remaining field value of Como Zoo.// You may place this beside Capacity to group Zoo field values.this.ComoZoo.Name = "Como Zoo";
// Create the ticket booth.this.ComoZoo.TicketBooth = newBooth();
ACheck Your Work
1Open ZooScenario/MainWindow.xaml.cs
2Inside newComoZooButton_Click, set a breakpoint on the first line in this group, such as this.ComoZoo.LadiesRoom = new Restroom();
3Start the application with F5 (Start Debugging) and click the New Como Zoo button
4Press F10 (Step Over) several times to execute the remaining main field assignments one line at a time
5As you step, verify that this.ComoZoo.LadiesRoom, this.ComoZoo.MensRoom, and this.ComoZoo.TicketBooth change from null to objects
6Also verify that this.ComoZoo.Name becomes "Como Zoo"
8.Assign the Featured Animal's Fields
Current object state after this task.
NNew
CChanged
RRemoved
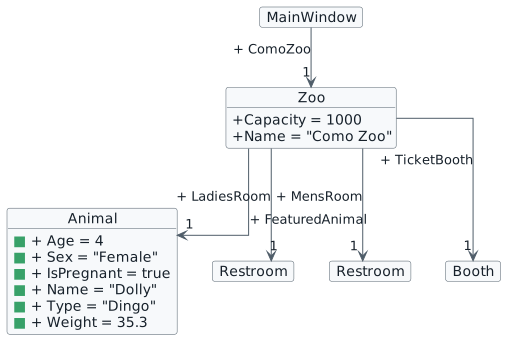
// Assign field values of the featured animal.this.ComoZoo.FeaturedAnimal.Age = 4;
this.ComoZoo.FeaturedAnimal.Sex = "Female";
this.ComoZoo.FeaturedAnimal.IsPregnant = true;
this.ComoZoo.FeaturedAnimal.Name = "Dolly";
this.ComoZoo.FeaturedAnimal.Type = "Dingo";
this.ComoZoo.FeaturedAnimal.Weight = 35.3;
ACheck Your Work
1Open ZooScenario/MainWindow.xaml.cs
2Inside newComoZooButton_Click, set a breakpoint on the first featured animal field assignment, such as this.ComoZoo.FeaturedAnimal.Age = 4;
3Start the application with F5 (Start Debugging) and click the New Como Zoo button
4Press F10 (Step Over) several times to execute the featured animal field assignments one line at a time
5Inspect this.ComoZoo.FeaturedAnimal and verify that its fields contain Dolly, Dingo, Female, age 4, pregnant set to true, and weight 35.3
9.Assign the Restroom and Ticket Booth Fields
Current object state after this task.
NNew
CChanged
RRemoved
// Assign field values of the ladies' restroom.this.ComoZoo.LadiesRoom.Capacity = 4;
this.ComoZoo.LadiesRoom.Sex = "Female";
// Assign field values of the men's restroom.this.ComoZoo.MensRoom.Capacity = 4;
this.ComoZoo.MensRoom.Sex = "Male";
// Create and assign field values of the ticket booth.this.ComoZoo.TicketBooth.Attendant = newEmployee();
this.ComoZoo.TicketBooth.TicketPrice = 15.00m;
ACheck Your Work
1Open ZooScenario/MainWindow.xaml.cs
2Inside newComoZooButton_Click, set a breakpoint on the first restroom field assignment, such as this.ComoZoo.LadiesRoom.Capacity = 4;
3Start the application with F5 (Start Debugging) and click the New Como Zoo button
4Press F10 (Step Over) several times to execute the restroom and ticket booth assignments one line at a time
5Inspect this.ComoZoo.LadiesRoom and this.ComoZoo.MensRoom to confirm that each has a capacity and sex value
6Inspect this.ComoZoo.TicketBooth to confirm that TicketPrice is 15.00 and Attendant is no longer null
10.Assign the Attendant's Fields
Current object state after this task.
NNew
CChanged
RRemoved
// Assign field values of the ticket booth attendant.this.ComoZoo.TicketBooth.Attendant.Name = "Sam";
this.ComoZoo.TicketBooth.Attendant.Number = 42;
ACheck Your Work
1Open ZooScenario/MainWindow.xaml.cs
2Inside newComoZooButton_Click, set a breakpoint on this.ComoZoo.TicketBooth.Attendant.Name = "Sam";
3Start the application with F5 (Start Debugging) and click the New Como Zoo button
4Press F10 (Step Over) to execute the attendant name and number assignments one line at a time
5Inspect this.ComoZoo.TicketBooth.Attendant and verify that the name is "Sam" and the number is 42
11.Finish and Submit
Before submitting, make sure the project runs and uses the expected object values.
ACheck Your Work
1Open ZooScenario/MainWindow.xaml.cs
2Inside newComoZooButton_Click, set a breakpoint on this.ComoZoo = new Zoo();
3Start the application with F5 (Start Debugging)
4Click the New Como Zoo button
5Press F10 (Step Over) to execute the method one line at a time and inspect this.ComoZoo, FeaturedAnimal, LadiesRoom, MensRoom, TicketBooth, and Attendant
6Confirm that each object exists and that the values match the checkpoint requirements
7Press F5 (Continue) to continue running and confirm that the application does not stop on an exception
8Build the solution by selecting Build > Build Solution
9Open the Error List and review both errors and warnings
10Resolve every StyleCop warning caused by your work before submitting
11Build the solution again and confirm that no new errors or StyleCop warnings remain
12Stop debugging, save your work, and submit according to your instructor's directions
BSubmit Your Work
Stop debugging, save your work, and submit according to your instructor's directions.
12.Checkpoint Summary
Details
A Zoo object is assigned to MainWindow.ComoZoo.
The Zoo stores its name and capacity.
The Zoo references a featured animal, two restrooms, and a ticket booth.