A Visual Studio solution can contain many files.
Opening files by guessing from the Windows file system can make the project harder to understand.
Solution Explorer gives you a structured view of the solution, its projects, and their files.
You have already seen the hierarchy:
Solution → Project → Files
Now you will use that hierarchy to locate the source related to a particular programming task.
When a supplied course solution is open, Solution Explorer shows the solution at the top.
Beneath it are one or more projects.
A simplified example might look like:
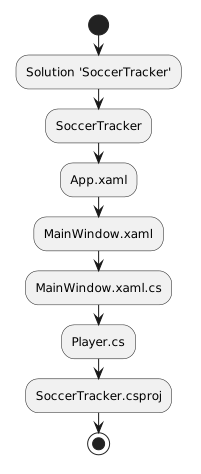
Solution 'SoccerTracker'
└── SoccerTracker
├── App.xaml
├── MainWindow.xaml
├── MainWindow.xaml.cs
├── Player.cs
└── SoccerTracker.csproj
The actual course project may use different names.
Use the names in the supplied solution rather than renaming files to match an example.
Projects can contain many items.
Expand the project and locate the file named in the current directions.
If the task concerns a Player type, a file such as Player.cs may be relevant.
If the task concerns behavior associated with a WPF window, a related .xaml.cs file may be relevant.
Do not assume every file needs to be opened for every task.
The requirement should guide your navigation.
Common files include:
.csC# source code.
.xamlWPF user-interface markup.
.xaml.csC# code associated with a XAML file.
.csprojProject configuration.
.slnSolution organization.
Recognizing the file type helps you avoid editing configuration or markup when the task actually calls for C# source.
Double-click the intended source file in Solution Explorer.
Visual Studio opens the file in the editor.
Read the surrounding code before making a change.
The line you need is part of a larger source file with a purpose and location.
Do not copy a small snippet into a new file simply because it is easier to see there.
Work in the supplied structure unless the course specifically directs you to add or move something.
A source file can be longer than the few statements involved in the current task.
Use the structure of the code to orient yourself.
Look for:
If the file contains several sections, confirm that you are editing the correct one before changing code.
Solution Explorer answers:
Where is the file?
The code editor answers:
What is inside the file?
Later IDE tools can answer other questions.
For example:
Knowing which tool answers which question keeps troubleshooting focused.
A supplied solution may be used by:
Avoid:
Changes to project structure can create problems that are unrelated to the concept you are trying to learn.
Suppose the requirement says:
Observe the code that decides whether a player appears in the available-player list.
A useful navigation process is:
The requirement gives you the destination.
Solution Explorer helps you get there.
As applications become larger, memorizing every file becomes less practical.
Use Solution Explorer as the project map.
The ability to locate relevant code in an existing solution is part of programming work—not an extra step that happens before the “real” programming begins.