0.2 First Day Assignment

Overview
1.First Day Assignment
2.Download the starting Zip file and store it in your OneDrive
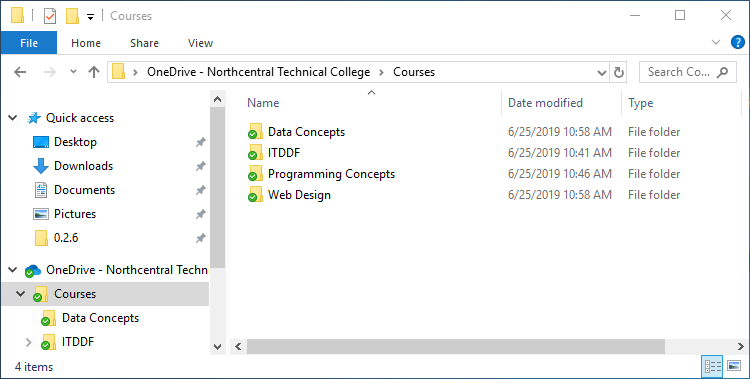
A Ensure your OneDrive is set up correctly with a Courses file at the root with folders for Data Concepts, ITDDF, Programming Concepts and Web Design
0.2 First Day 1 Snip OneDrive
0.2 First Day 1 Snip OneDrive.png
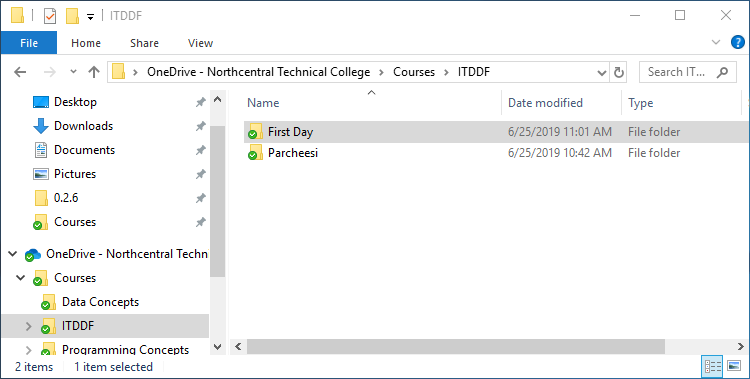
B In the ITDDF folder, create a new folder named First Day
0.2 First Day 1 Snip OneDrive2
0.2 First Day 1 Snip OneDrive2.png
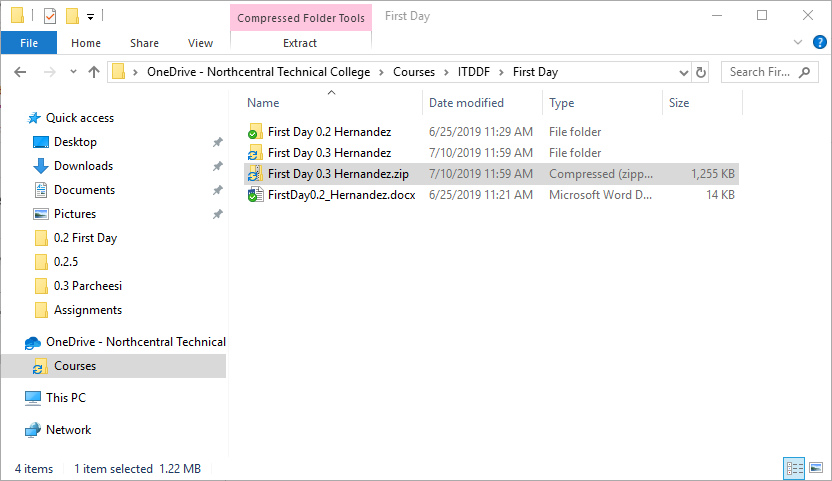
C Download the zip file and rename the folder and sln
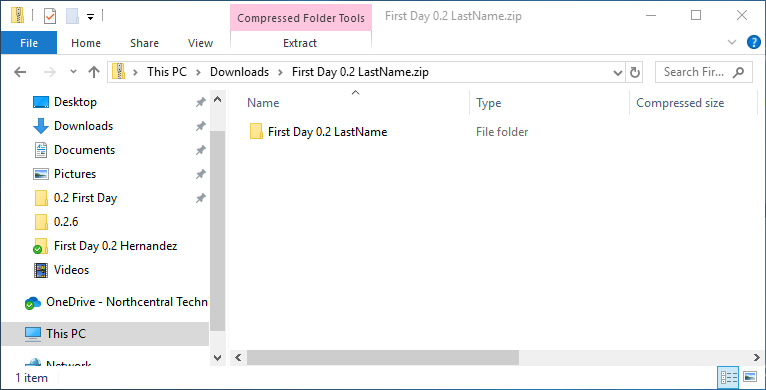
1 Double click the file you downloaded to go into the zip file
0.2 First Day 1 Snip Zip
0.2 First Day 1 Snip Zip.png
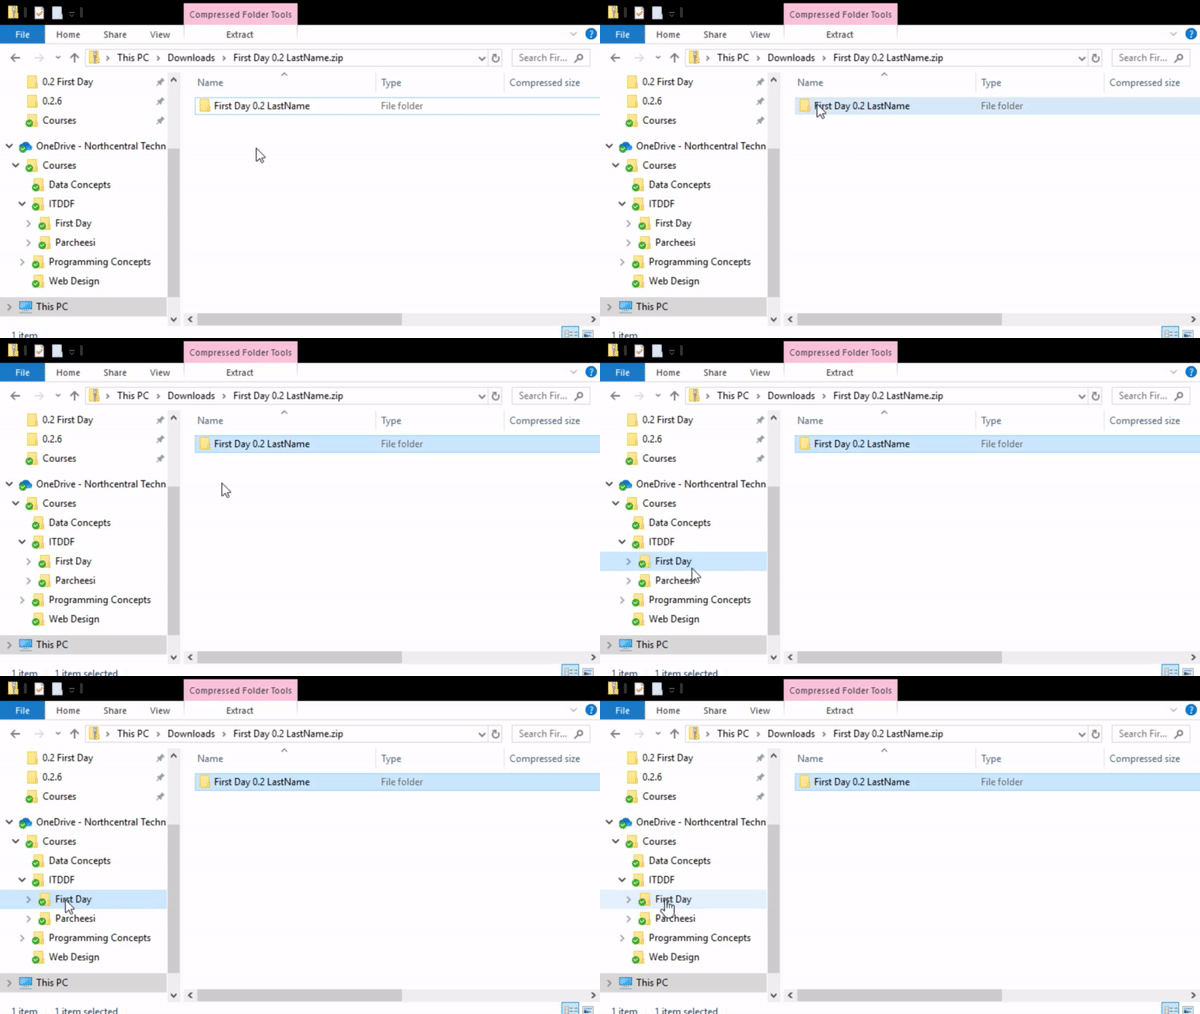
2 Drag the file from inside the zip to your First Day folder in OneDrive to copy it
Instructional image from 0.2 First Day Assignment, page 2
0_2_First_Day_Assignment__0.2%20First%20Day%201%20Gif%20Copy
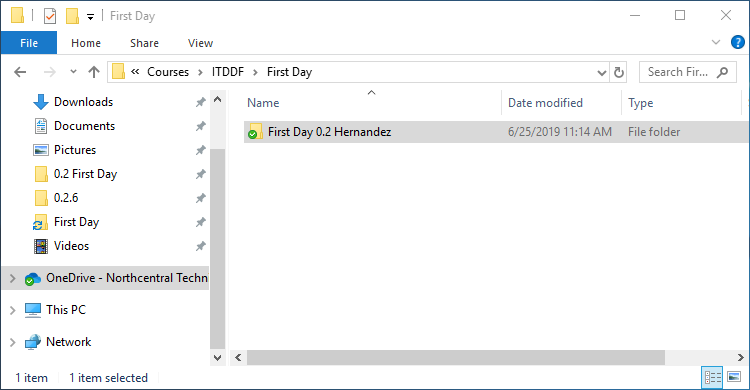
3 Rename the folder to your own last name
0.2 First Day 1 Snip RenameFolder
0.2 First Day 1 Snip RenameFolder.png
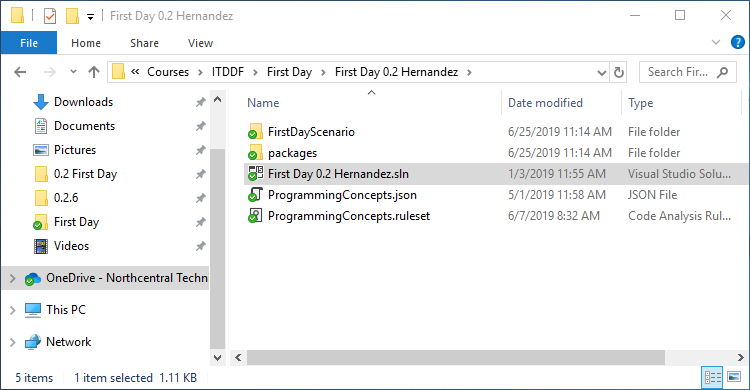
4 Double click the folder. Inside the folder, rename the .sln file to your last name
0.2 First Day 1 Snip RenameSln
0.2 First Day 1 Snip RenameSln.png
3.Enable "file name extensions" and "Hidden items" in File Explorer
A In File Explorer, click on the "View" tab
0.2 First Day 2 Snip View
0.2 First Day 2 Snip View.png
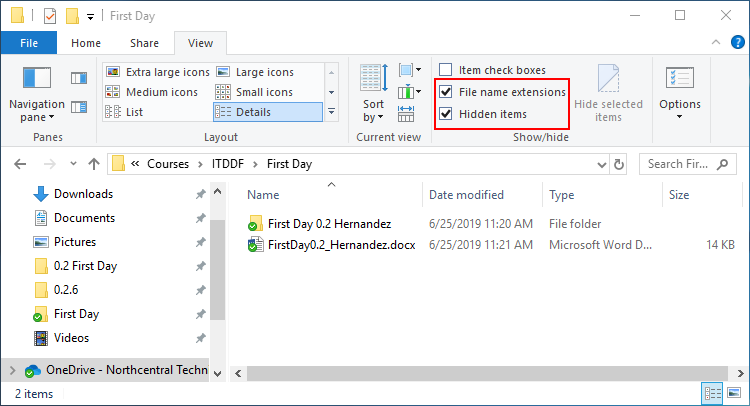
B Check the box for "File name extensions" and "Hidden items"
0.2 First Day 2 Snip ViewSettings
0.2 First Day 2 Snip ViewSettings.png
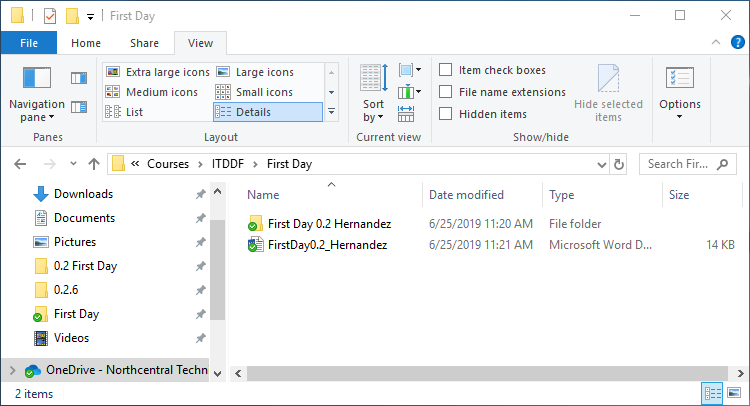
C Check your work
1 Verify "File name extensions"

Before enabling "File name extensions" in File Explorer, your File Explorer should look similar to the following:
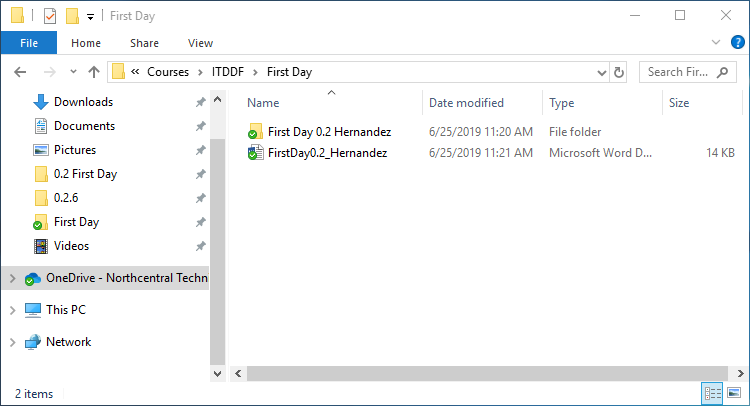
0.2 First Day 2 Snip BeforeExt
0.2 First Day 2 Snip BeforeExt.png

After enabling "File name extensions" in File Explorer, your File Explorer should look similar to the following:
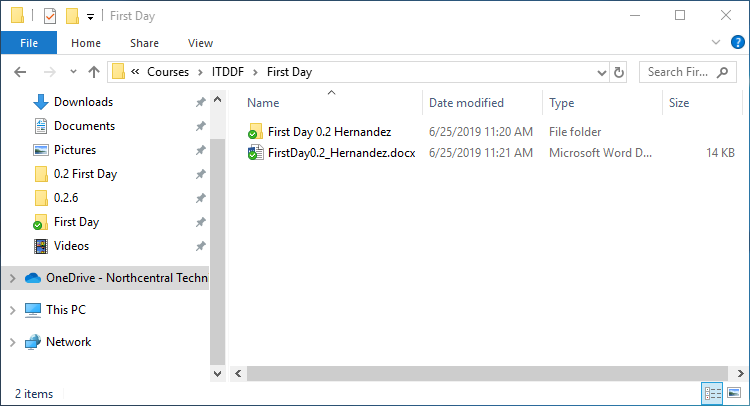
0.2 First Day 2 Snip AfterExt
0.2 First Day 2 Snip AfterExt.png
2 Verify "Hidden items"

Before enabling "Hidden items" in File Explorer, your File Explorer should look similar to the following:
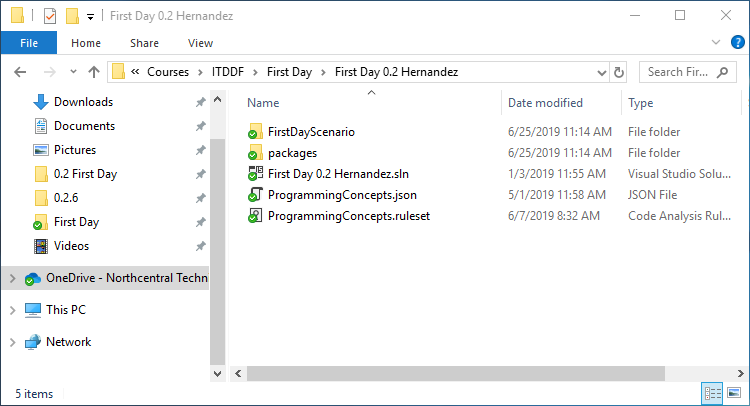
0.2 First Day 2 Snip BeforeHidden
0.2 First Day 2 Snip BeforeHidden.png

After enabling "Hidden items" in File Explorer, your File Explorer should look similar to the following:
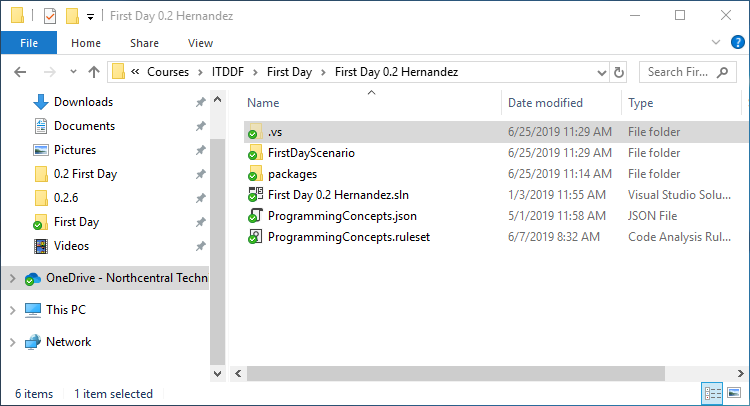
0.2 First Day 2 Snip AfterHidden
0.2 First Day 2 Snip AfterHidden.png

Notice the ".vs" folder and how it is slightly transparent. Folders that have a preceding period in its name will be hidden.
4.Debugging and Feedback System
5.Open your First Day project
A Open the First Day project you created earlier in this assignment
B Open the solution file and go to MainWindow.xaml.cs
6.Fix a build error
A Build your application
Instructional image from 0.2 First Day Assignment, page 2
02_First_Day_Assignment__page-02-image-02

Build Application

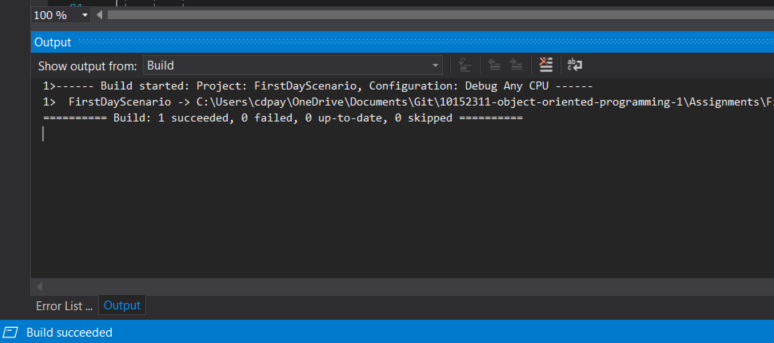
Your Output window should look like the image below.

Instructional image from 0.2 First Day Assignment, page 2
02_First_Day_Assignment__page-02-image-03

Build Output

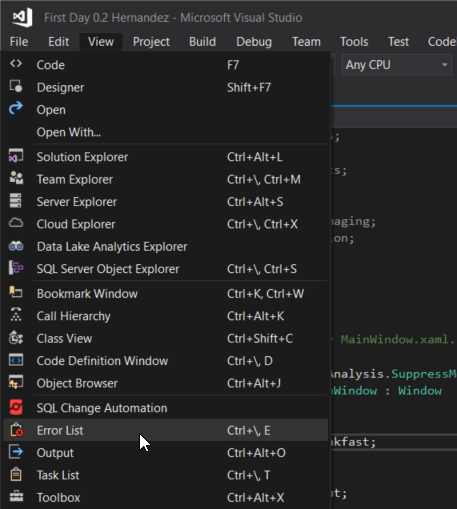
B Go to View and select Error List
Instructional image from 0.2 First Day Assignment, page 3
02_First_Day_Assignment__page-03-image-04

Snip - Show Error List

This will bring up a window that shows you issues with the code. These issues are known as compiler errors. Visual Studio has a built in compiler that checks for errors as you write code.
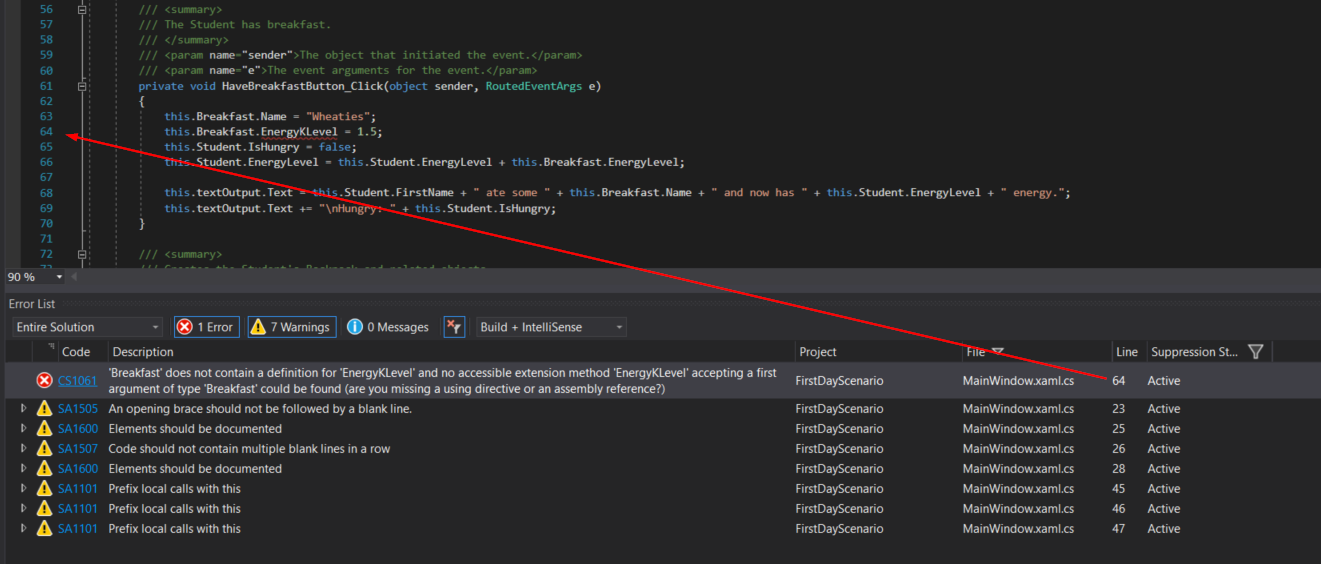
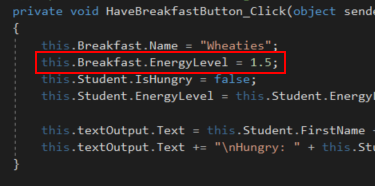
C Double click the error shown. It will bring you to the line that the error is on
Instructional image from 0.2 First Day Assignment, page 3
02_First_Day_Assignment__page-03-image-05

Snip - Error Line

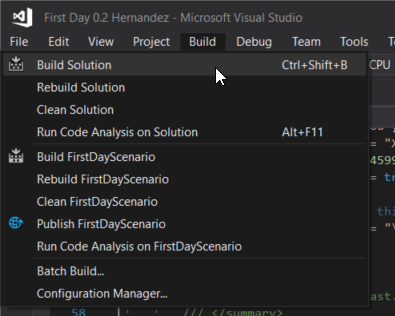
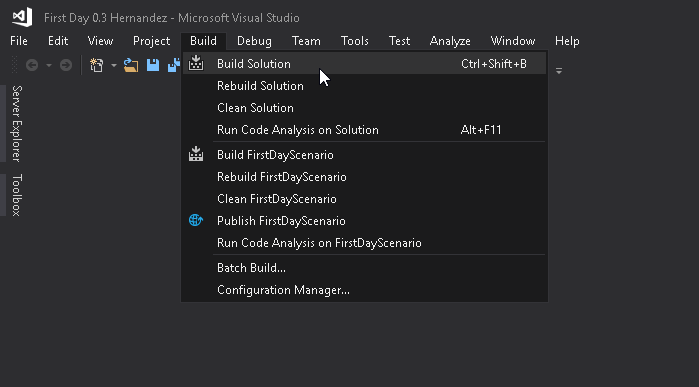
D On the main menu, click Build and then Build Solution
Instructional image from 0.2 First Day Assignment, page 4
02_First_Day_Assignment__page-04-image-06

Snip - Build

Because we have an error in our code the application will not build properly, meaning that Visual Studio recognizes that something isn't right and the application is not usable. It will show that the build has failed in the status bar on the bottom.

Instructional image from 0.2 First Day Assignment, page 4
02_First_Day_Assignment__page-04-image-07

Build Failed

E Start the application

Every time we start the application, the application saves and then builds first.

1 Because there are build errors, Visual Studio will stop the application from running

If you get a prompt instead, select 'No' and make sure your Build Settings are correct. If you don't get a prompt but the application still runs it means your settings are incorrect and you will need to fix them.
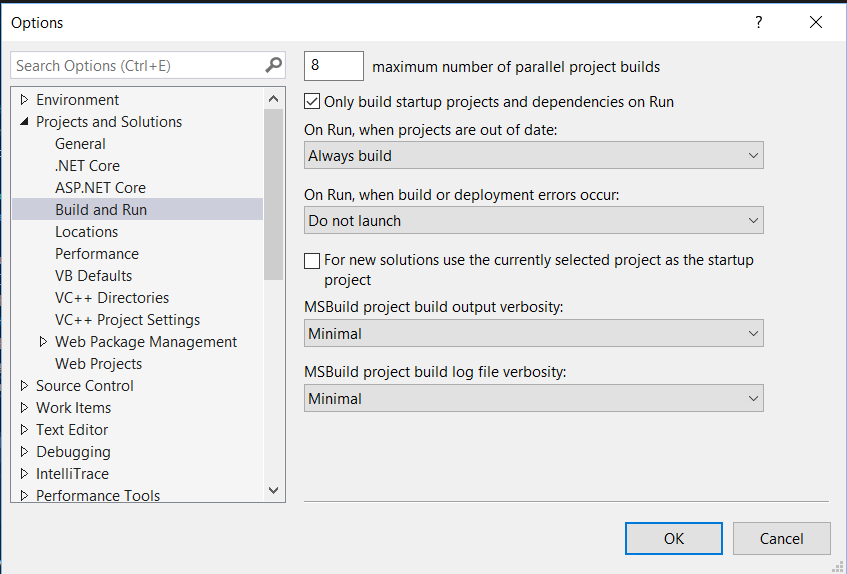
Instructional image from 0.2 First Day Assignment, page 5
02_First_Day_Assignment__page-05-image-08

Build Settings

F Fix the error that is occurring by removing the K between Energy and Level
Instructional image from 0.2 First Day Assignment, page 5
02_First_Day_Assignment__page-05-image-09

Snip - Fix Error

G Click Build and then Build Solution. The application will build correctly and the Output window should show that the Build was successful
Instructional image from 0.2 First Day Assignment, page 6
02_First_Day_Assignment__page-06-image-10

Snip - Build Succeeded

H Start the application. The application should start normally
Instructional image from 0.2 First Day Assignment, page 6
02_First_Day_Assignment__page-06-image-11

Snip - Start Application

7.Upload the First Day Assignment to the Feedback System
A Zip up the folder that contains your .sln file and project files
0.2 First Day 4 Snip ZipFolder
0.2 First Day 4 Snip ZipFolder.png
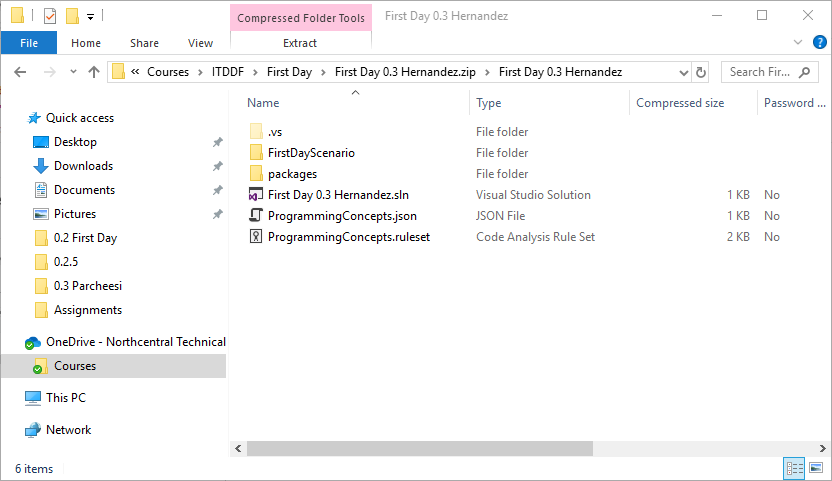
B Double click the zip file. Double click the folder inside the zip file. Ensure that your folder ONLY contains the .vs folder (you can delete this if you like), the Scenario folder and the .sln file
0.2 First Day 4 Snip InsideZipFolder
0.2 First Day 4 Snip InsideZipFolder.png
C Go to the Feedback System website
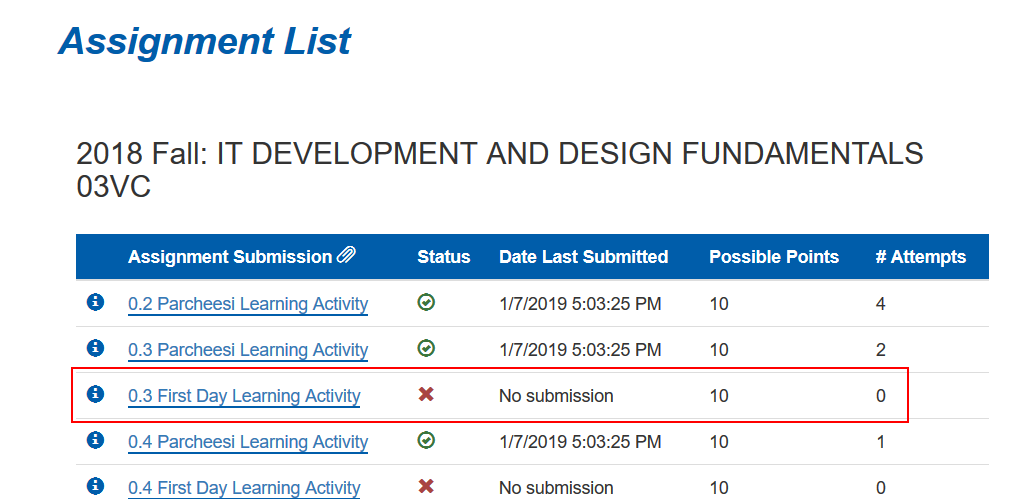
D Select the First Day 0.2 Assignment
Instructional image from 0.2 First Day Assignment, page 11
02_First_Day_Assignment__page-11-image-25

Feedback Assignment

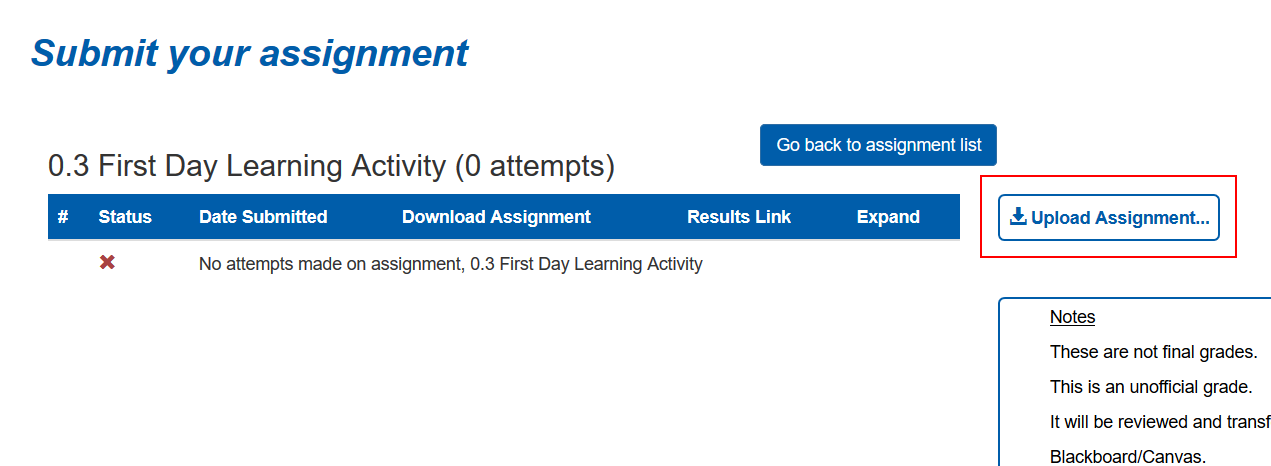
E Click the Upload Assignment button
Instructional image from 0.2 First Day Assignment, page 12
02_First_Day_Assignment__page-12-image-26

Upload Button

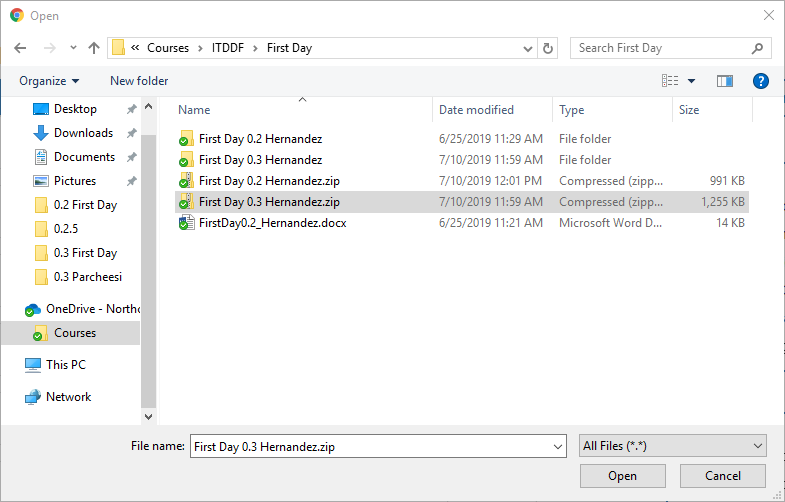
F Select your zip file and click Open
0.2 First Day 4 UploadToFBS
0.2 First Day 4 UploadToFBS.png
8.Observe Feedback System Errors
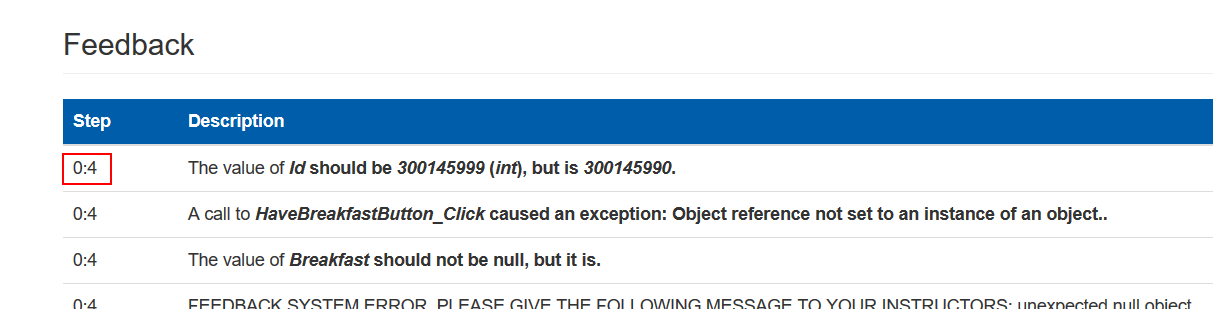
A The Feedback System will show you the particular step in the instructions where the error is occurring. We don't have steps in these assignments so just be aware that with future assignments the step number and letter show up to the left of the Description
Instructional image from 0.2 First Day Assignment, page 13
02_First_Day_Assignment__page-13-image-28

Step Number

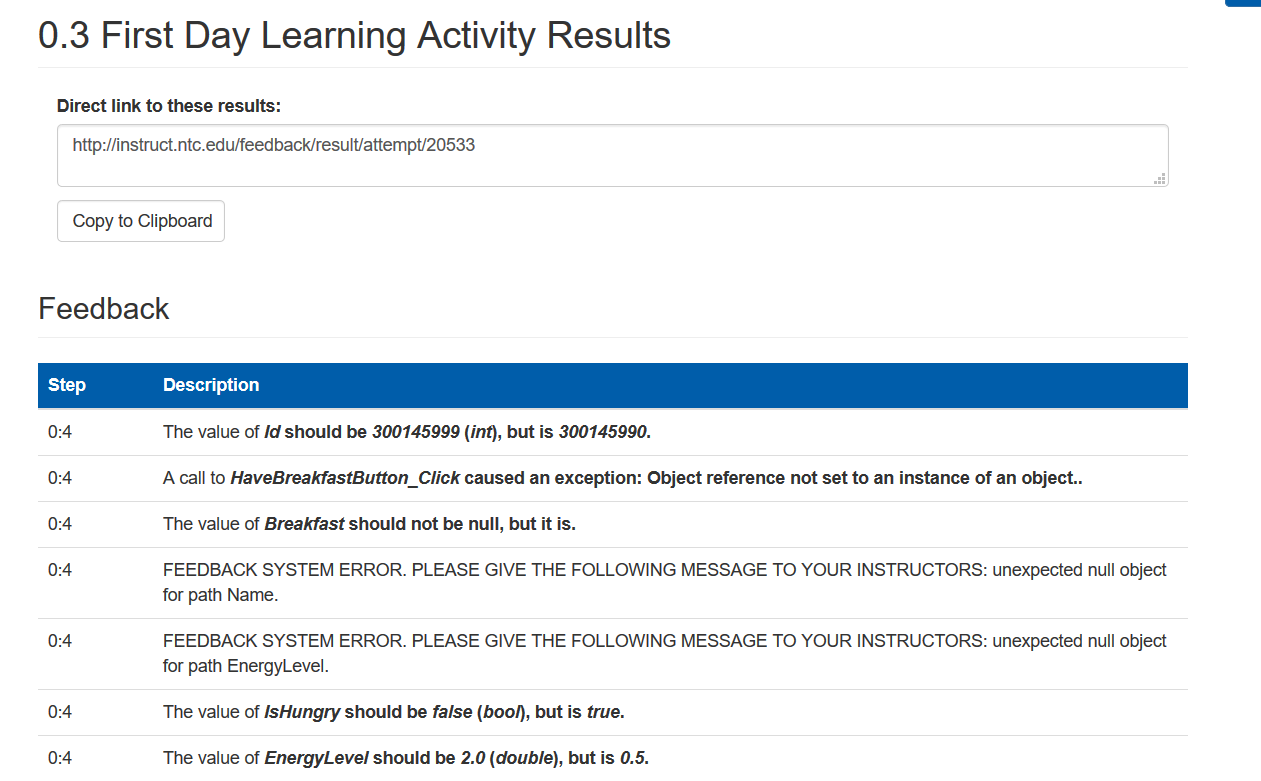
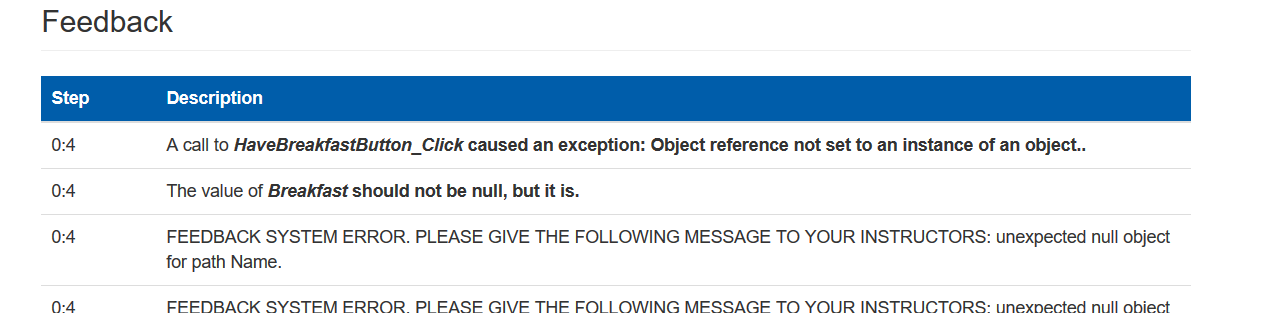
B Your Feedback System errors should look like the errors below. If they do not please reach out to your instructor
Instructional image from 0.2 First Day Assignment, page 13
02_First_Day_Assignment__page-13-image-29

Feedback Errors

C Sometimes the error will be a CRITICAL ERROR. If that is that case, always solve that error before moving on to anything else. Errors shown AFTER a CRITICAL ERROR are not relevant
D There will be many times when several error messages are related to one another. This means that multiple error messages could be resolved by fixing just one thing in code. It will help you to read all the errors at once to determine if any of the errors are related
9.Fix your first error
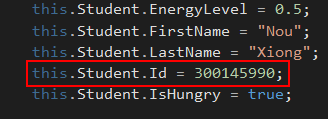
A Our first error says "The value of Id should be 300145999 (int), but is 300145990."
B Open your First Day 0.2 project
C Navigate to the MainWindow
D Here we can see that the Student's Id was assigned incorrectly
Instructional image from 0.2 First Day Assignment, page 14
02_First_Day_Assignment__page-14-image-30

Id Error

E Change the last number in the Id from a 0 to a 9
F Build your application
G Close VIsual Studio
H Delete the zip file you created previously. This is an old version of the application we don't want anymore
I Zip the parent folder as you did previously
J Click the Resubmit button
Instructional image from 0.2 First Day Assignment, page 14
02_First_Day_Assignment__page-14-image-31

Resubmit

K Select your new zip file and upload. The error about the Id should now be gone
Instructional image from 0.2 First Day Assignment, page 14
02_First_Day_Assignment__page-14-image-32

Error Fixed

10.Fix the next error
A The next error we need to fix is related to all of the remaining errors. The first error says that when the event handler was called there was an exception. We can test that locally
B Open your First Day 0.2 project
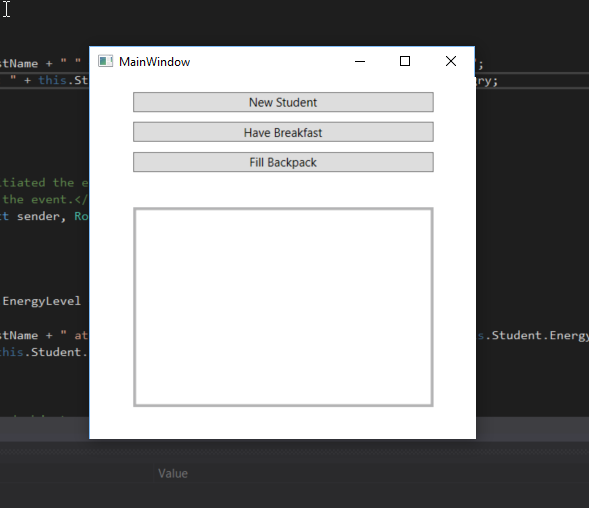
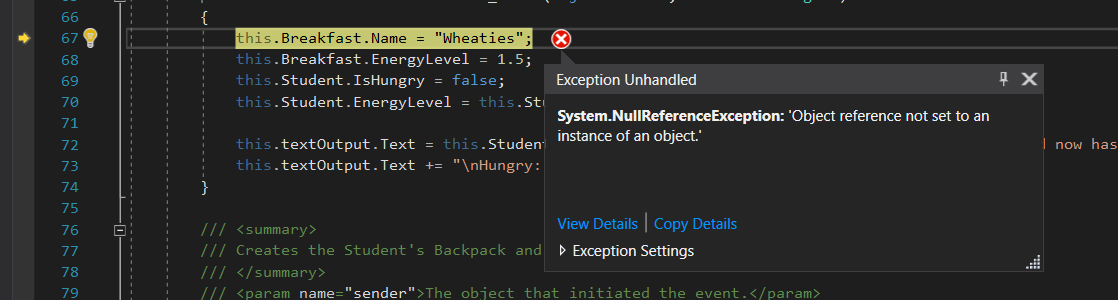
C Start the application. Click the 'New Student' button and the 'Have Breakfast' button. You will get a NullReferenceException because we are trying to use a field of an object that doesn't even exist yet. Stop the application
Instructional image from 0.2 First Day Assignment, page 15
02_First_Day_Assignment__page-15-image-33

NullReferenceException

D Because of this exception, the rest of the application doesn't run. Look at the rest of our errors: Breakfast is null, the Name field can't be read, the EnergyLevel field can't be read, the IsHungry field is wrong, the EnergyLevel field is wrong. These are all things happen AFTER the error we got when we ran the application
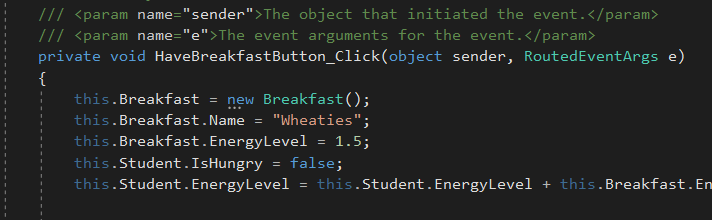
E Before the line of that assigns the Name field of the Breakfast object, instantiate (create) the Breakfast object by copying and pasting the code below
this.Breakfast = new Breakfast();
Instructional image from 0.2 First Day Assignment, page 15
02_First_Day_Assignment__page-15-image-34

New Breakfast Object

F Start the application again and click the 'New Student' and 'Have Breakfast' buttons. We no longer get the exception that breaks our application!
G Stop the application and close Visual Studio
H Delete the stale zip file and zip the new application like we did previously
I Resubmit the new zip file to the Feedback System
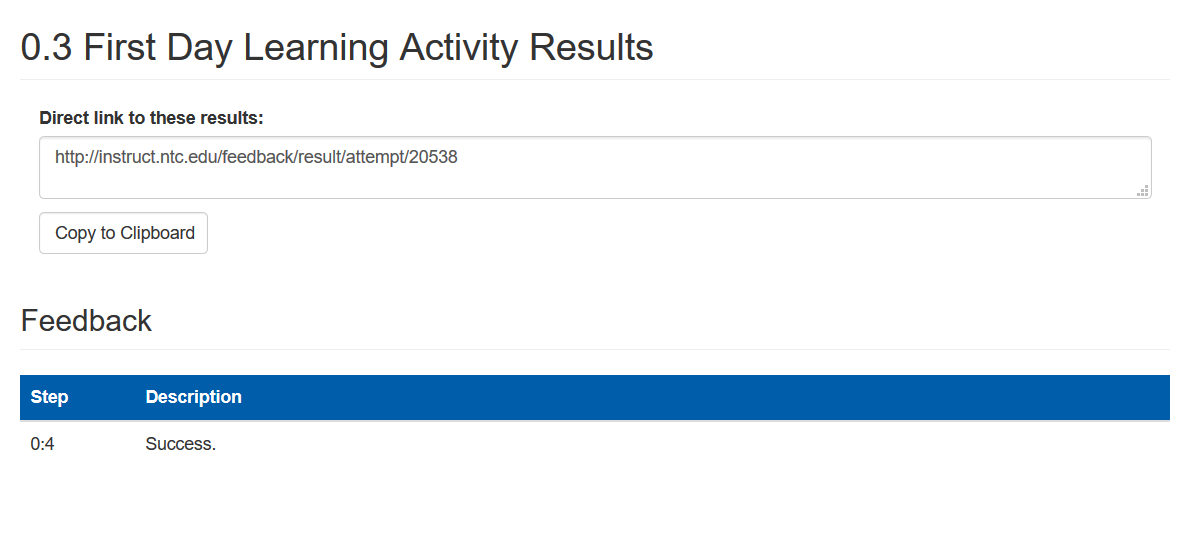
J Ensure that you now get a Success message. If you do not please reach out to your instructor
Instructional image from 0.2 First Day Assignment, page 16
02_First_Day_Assignment__page-16-image-35

Success Message

K Copy the URL and submit it to Canvas