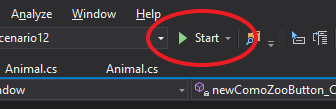
You can start the application by either pressing Start in the toolbar or pressing F5. This will bring up the WPF window/application.
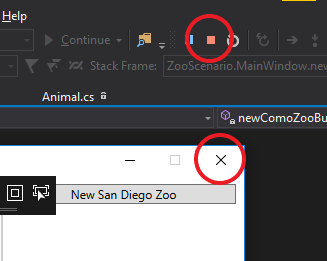
When the application is running you can stop the application by either pressing the Stop button in the toolbar or pressing SHFT+F5. If you click the X on the WPF application that will also stop the application.
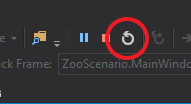
An alternative to starting and stopping the application is to restart it. This can be done by either clicking the Restart button in the toolbar or pressing CNTL+SHFT+F5. Restarting will act just like a full stop and start and will bring up the WPF application.
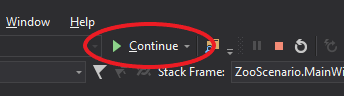
When setting breakpoints and stepping through the code, the debugger will give you the option to Continue. When clicking Continue, the debugger will step through the code until it hits either the next breakpoint or the end of the code of whatever event handler you are in. This is a helpful tool when you are setting multiple breakpoints throughout the code and/or testing different button functionality.