Overview
1.Overview
Visual Studio is a leading integrated development environment (IDE) used for writing and debugging code in many languages, including C#.
2.Sign In
A
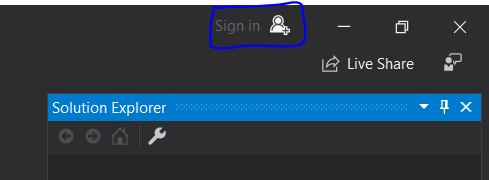
Open Visual Studio and sign in in the upper right corner of the application
B
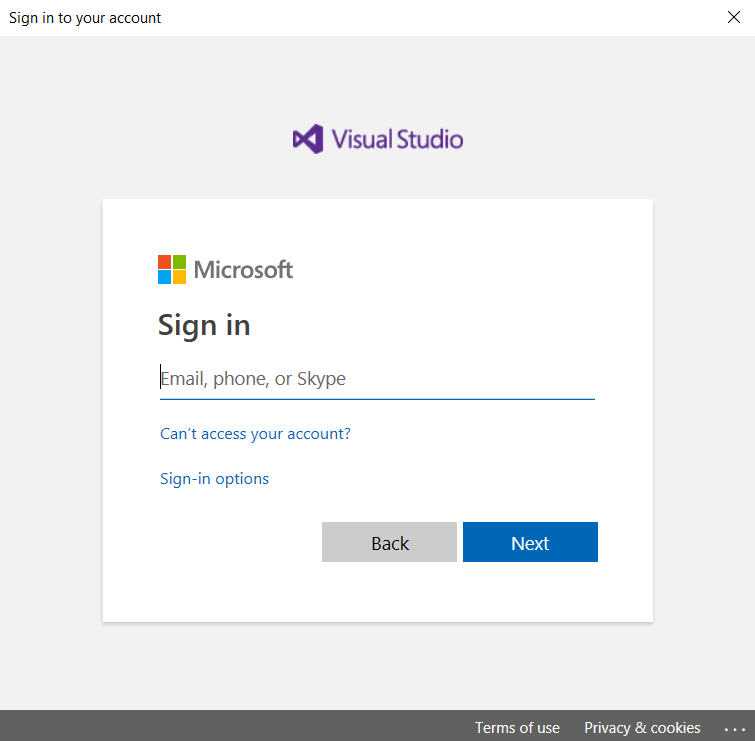
Upon clicking sign in, you'll receive a popup asking for your credentials. Enter your student email, and on the following popup, log in using your student ID and password
C
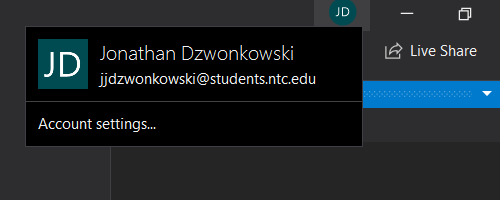
Now that you're logged in, click the circle in the corner representing your account, and click "Account Settings"
D
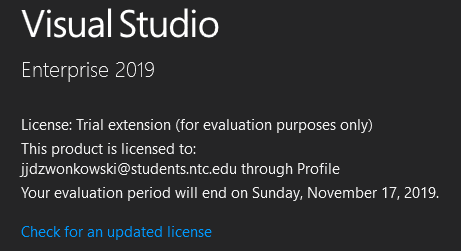
From here, click "Check for updated license" - this should extend your trial period to 90 days
3.Turn on the display of line numbers
A
Click Tools | Options
C
Check the Line numbers checkbox in the right-hand pane
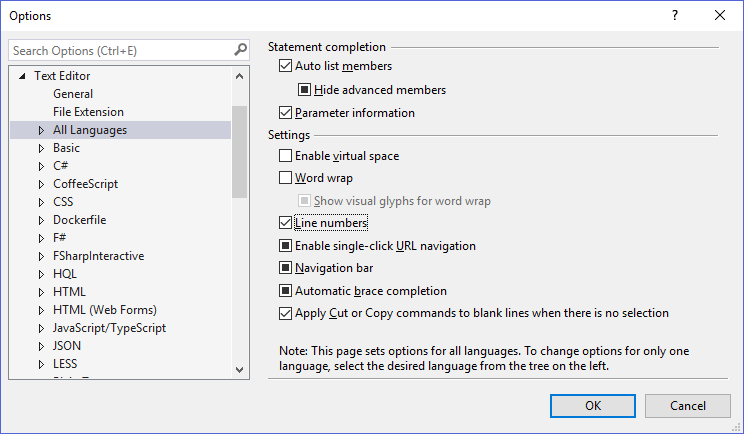
Line Numbers
4.Disable stepping over properties
A
Click Tools | Options
C
Uncheck the Step over properties and operators (Managed only) checkbox in the right-hand pane
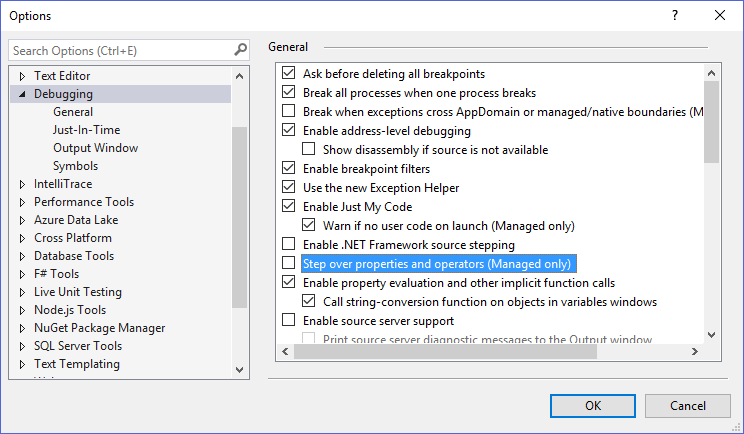
Disable Step Over Properties
5.Customize Visual Studio build settings
A
Click Tools --> Options in the file menu
B
Expand Project and Solutions in the left window
C
Select Build and Run in the left window
D
Click the drop-down for On Run, when projects are out of date and set it to Always build
E
Click the drop-down for On Run, when build or deployment errors occur and set it to Do not launch
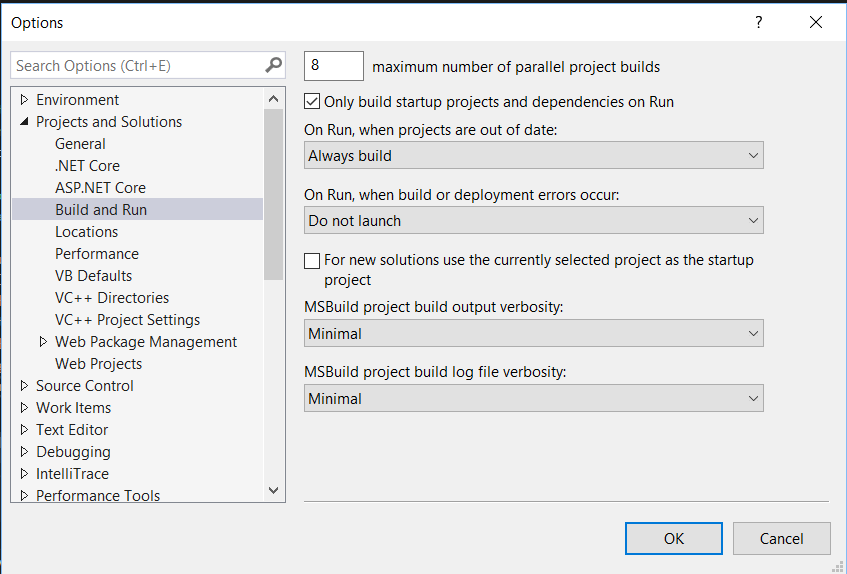
Build Settings
6.Disable Visual Tree
A
Click Tools --> Options in the file menu
B
Expand Debugging in the left window
C
If available, uncheck the box for "Show runtime tools in application". Note: If this does not appear as shown below, skip this step
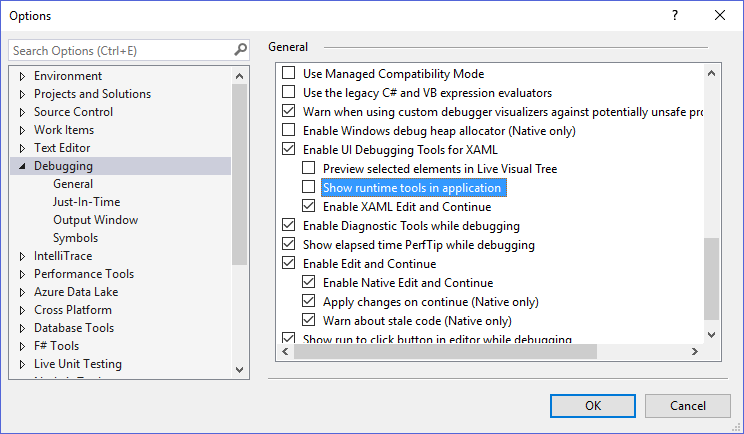
Remove Visual Tree
7.Customize the Text Editor
A
Click Tools --> Options in the file menu
B
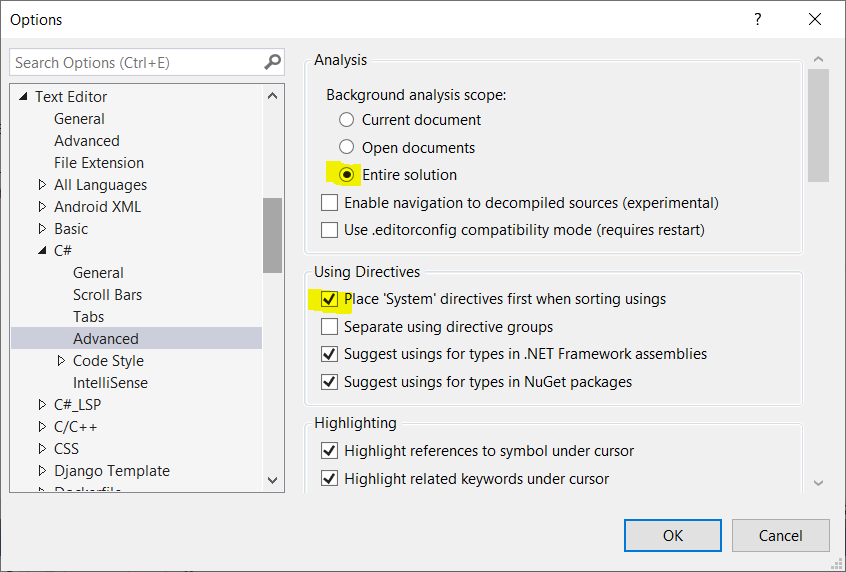
Expand Text Editor in the left window
C
Expand C# in the left window
D
Select Advanced in the left window
E
Check the box for Enable full solution analysis
F
Check the box for Place 'System' directives first when sorting usings
8.Submit Screenshots to Canvas
Submit the following screenshots directly to Canvas. Each screenshot must be readable, include enough surrounding context to verify the required evidence, and avoid unrelated or sensitive information.
- Account Settings after you have signed in and checked for an updated license.
- Text Editor | All Languages showing Line numbers enabled.
- Debugging options showing Step over properties and operators (Managed only) disabled.
- Projects and Solutions | Build and Run showing Always build and Do not launch.
- Text Editor | C# | Advanced showing Enable full solution analysis and Place 'System' directives first when sorting usings enabled.
- Conditional:If "Show runtime tools in application" is available on your system, include one additional screenshot showing that setting disabled.
Submit 5 required screenshots. Submit a 6th screenshot only when the conditional runtime-tools setting is available.