Visual Studio

Overview

Visual Studio

Visual Studio is a leading integrated development environment (IDE) used for writing and debugging code in many languages, including C#.

Work through the stories in order. Use the acceptance criteria to check each feature, and complete the nested tasks using the specified names, values, and scenarios.

Install and activate the course development tools
Acceptance Criteria
Acceptance criteria
  • The required components are selected during installation.
  • Visual Studio starts successfully and its license is registered where required.
Instructions
1.Download Visual Studio (Skip if already installed)

Download Visual Studio Enterprise 2017 from the Microsoft Azure site using the link below.

Microsoft Azure Instructions

In the case that there are any issues, use the provided download link and continue on with the assignment. Notify your instructor of the issue.

Visual Studio 2017 Trial Download Links

Visual Studio 2017 Trial Download Links
A Download Visual Studio (Skip if already installed)
2.Install Visual Studio

Install Visual Studio using all of the default installation options.

Visual Studio is pre-installed on all NTC A-building computers.
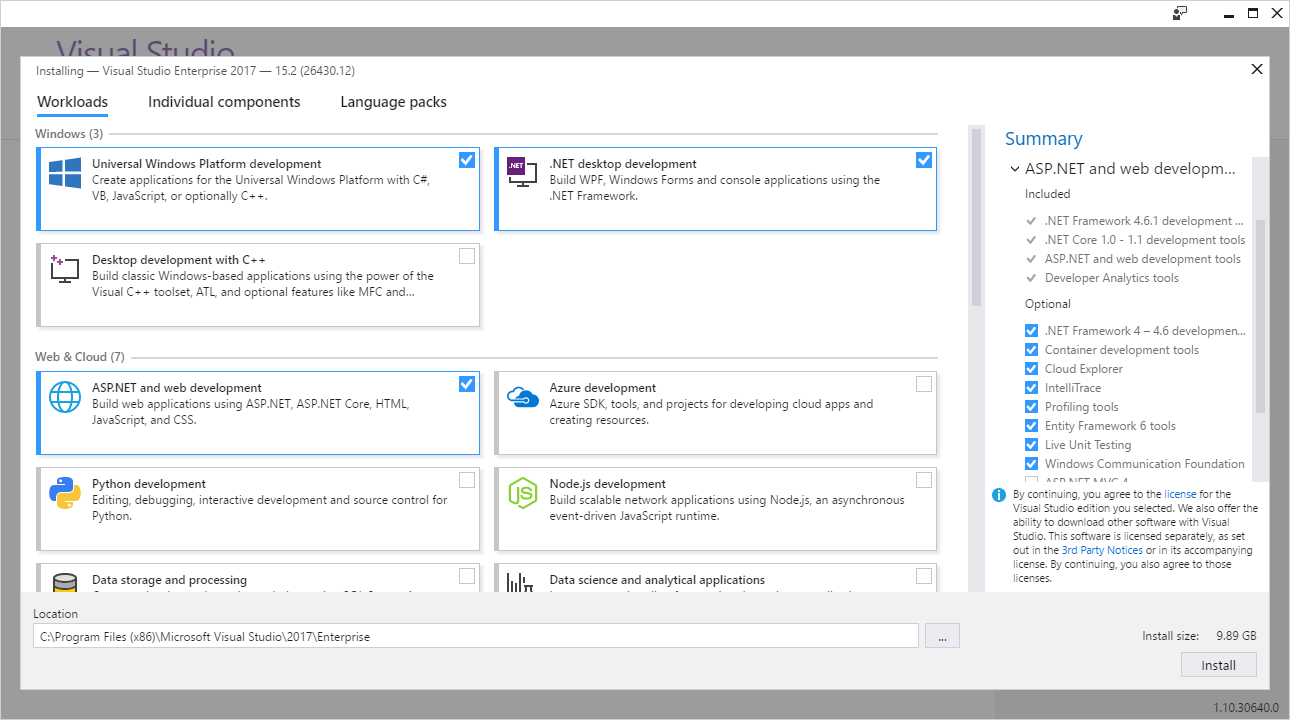
A On the Workloads screen, check the box for the .NET desktop development and ASP.NET and web development components.
Image: Visual Studio Components for Visual Studio. Use the adjacent task instructions to identify the required controls, output, or debugger values.
Image: Visual Studio Components
B Click Install
3.Register license key.
A Retrieve the Visual Studio product key from your order details by logging into the Microsoft Azure Dev Tools for Education website.
Microsoft Azure Dev Tools for Education
Microsoft Azure Dev Tools for Education
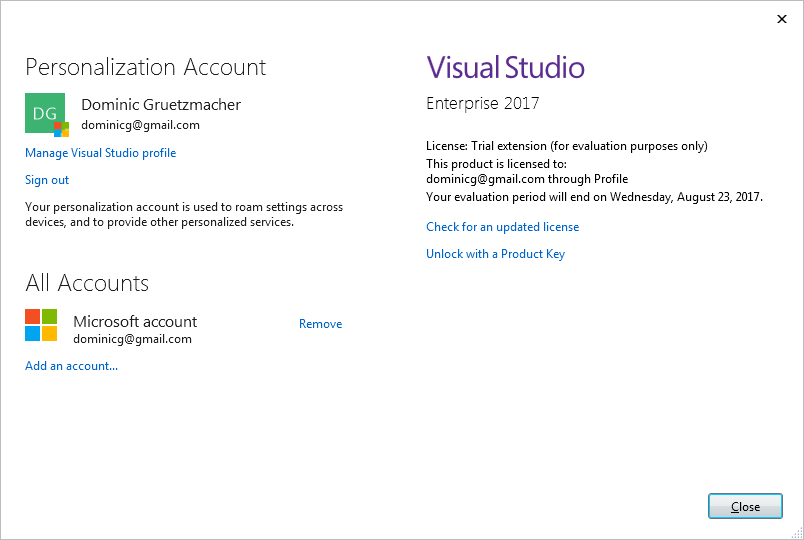
B Click Help --> Register Product
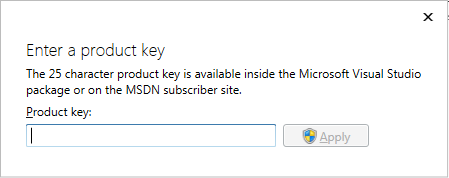
C Click Unlock with a Product Key.
Image: for Visual Studio. Use the adjacent task instructions to identify the required controls, output, or debugger values.
Image:
D Enter the product key to unlock Visual Studio.
Image: for Visual Studio. Use the adjacent task instructions to identify the required controls, output, or debugger values.
Image:
Configure the course debugging and editing environment
Acceptance Criteria
Acceptance criteria
  • Line numbers are visible.
  • Property stepping, build settings, Visual Tree, and text-editor settings match the instructions below.
Instructions
4.Turn on the display of line numbers
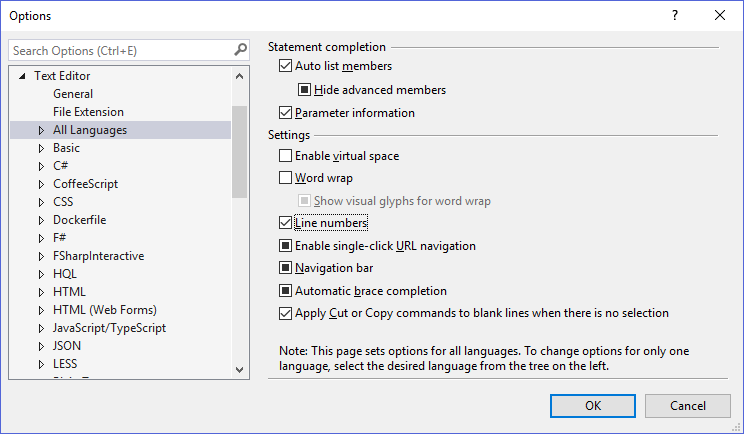
A Within the Options window, navigate to Text Editor | All Languages in the left-hand pane.
B Click Tools | Options.
C Check the Line numbers checkbox in the right-hand pane.
Image: for Visual Studio. Use the adjacent task instructions to identify the required controls, output, or debugger values.
Image:
5.Disable stepping over properties

This setting must also applied to NTC computers.
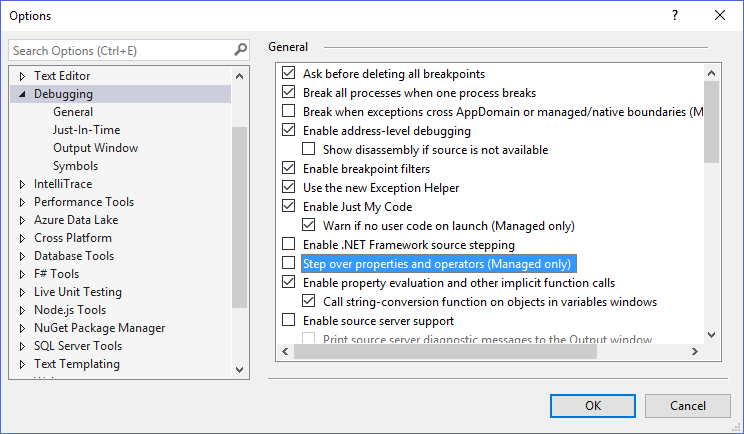
A Click Tools | Options.
B Within the Options window, navigate to Debugging in the left-hand pane.
C Uncheck the Step over properties and operators (Managed only) checkbox in the right-hand pane.
Image: for Visual Studio. Use the adjacent task instructions to identify the required controls, output, or debugger values.
Image:
6.Customize Visual Studio build settings

This setting must also applied to NTC computers.
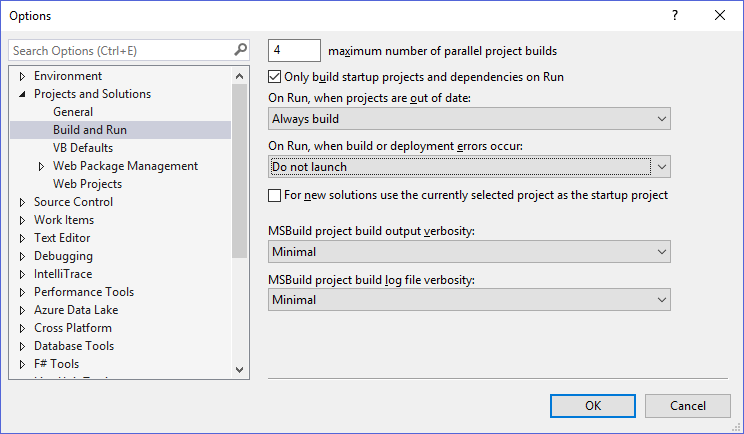
A Click Tools --> Options in the file menu.
B Expand Project and Solutions in the left window.
C Select Build and Run in the left window.
D Click the drop-down for On Run, when projects are out of date and set it to Always build.
E Click the drop-down for On Run, when build or deployment errors occur and set it to Do not launch.
Image: for Visual Studio. Use the adjacent task instructions to identify the required controls, output, or debugger values.
Image:
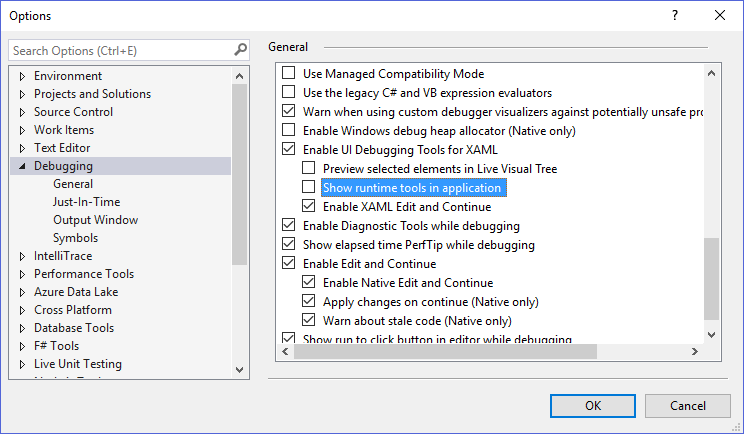
7.Disable Visual Tree
A Click Tools --> Options in the file menu.
B Expand Debugging in the left window.
C Uncheck the box for Show runtime tools in application.
Image: for Visual Studio. Use the adjacent task instructions to identify the required controls, output, or debugger values.
Image:
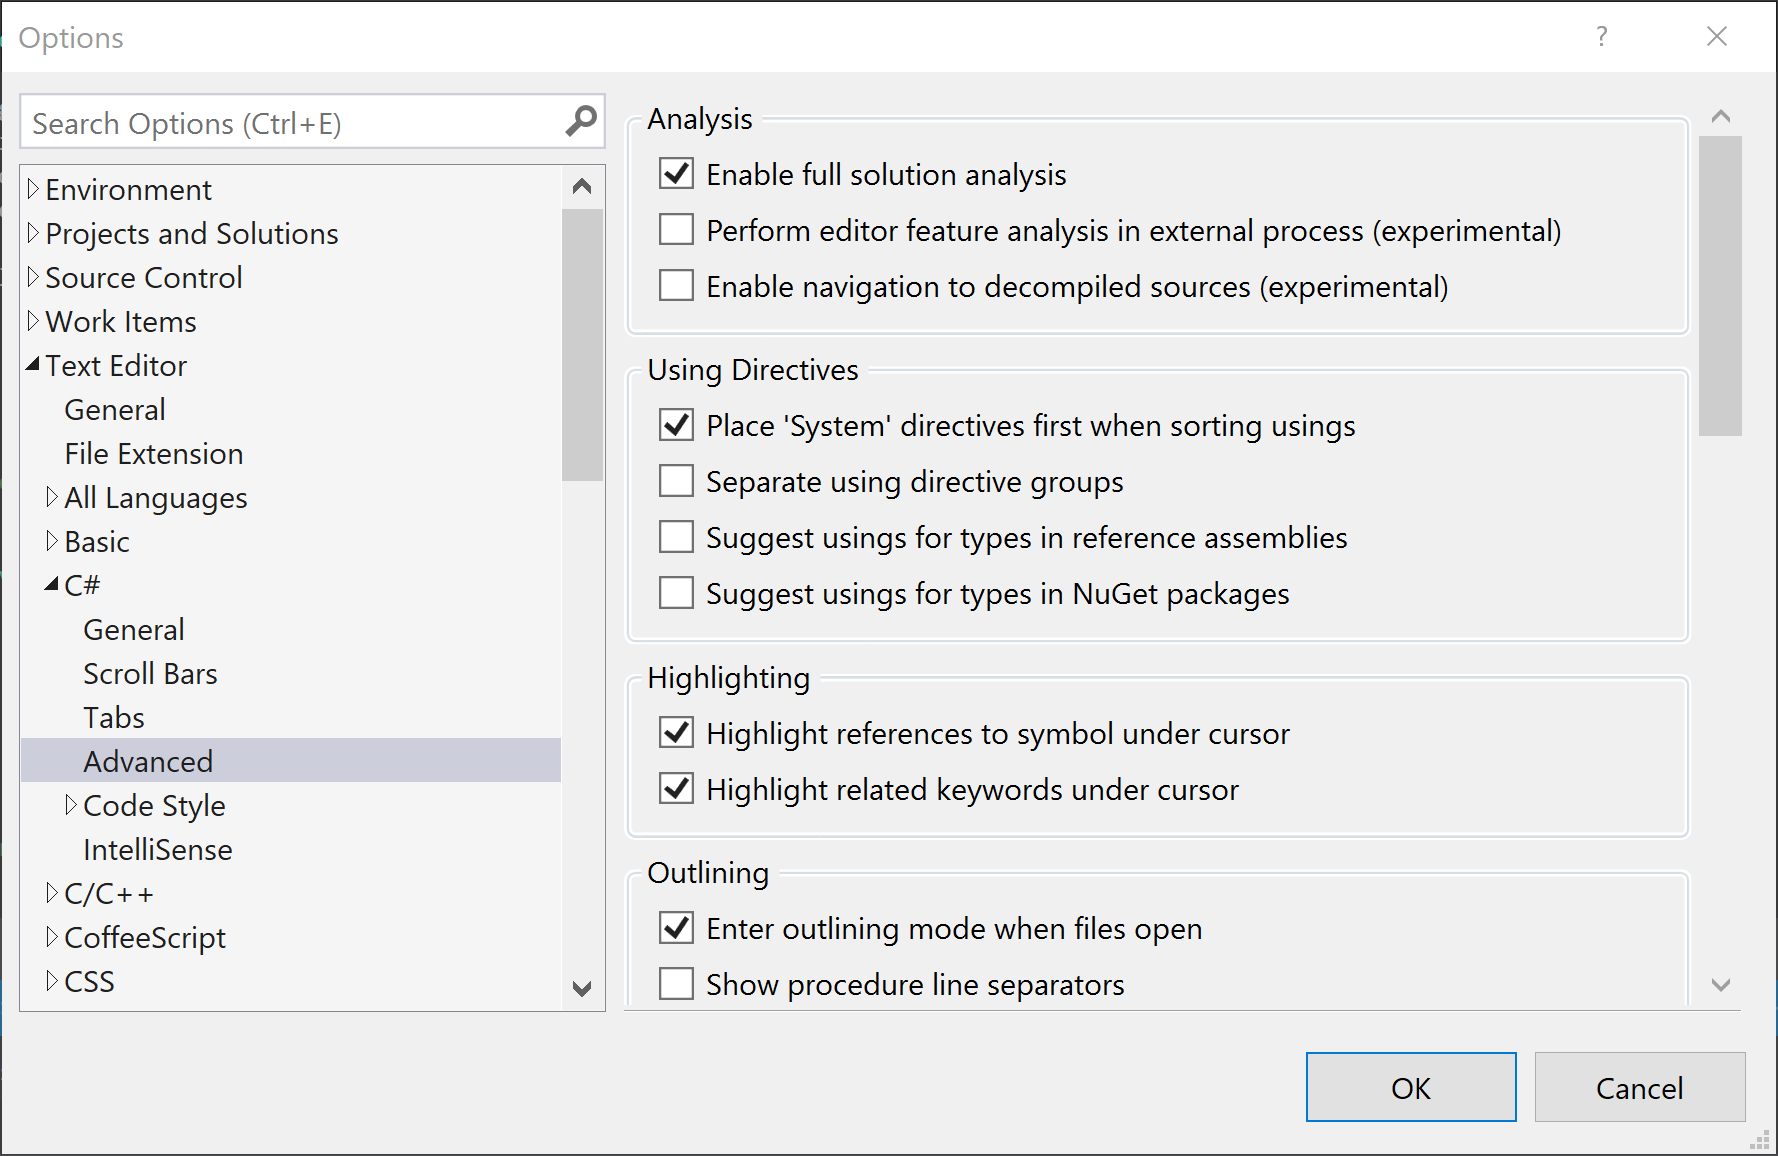
8.Customize the Text Editor
A Click Tools --> Options in the file menu.
B Expand Text Editor in the left window.
C Expand C# in the left window.
D Select Advanced in the left window.
E Check the box for Enable full solution analysis
F Check the box for Place 'System' directives first when sorting usings
Customize Text Editor for Visual Studio. Use the adjacent task instructions to identify the required controls, output, or debugger values.
Customize Text Editor
Completion review
9.Review the feature acceptance criteria
A Confirm the required results

Return to each story and verify its acceptance criteria. Preserve the submission format and destination stated in the activity; a reading, setup guide, lab, video demonstration, and oral final may require different evidence.

Install and activate the course development tools Configure the course debugging and editing environment