Deploying the Client Access Role
Points (10)
Plan for MAPI over HTTP and Outlook Anywhere. Lynda.com link.
Brief overview of using Microsoft Outlook outside of the network using various supported protocols such as RPC (Remote Procedure Call) over HTTP (older technology, supported only up through Exchange 2010), Outlook Anywhere (newer, quicker technology, supported by Exchange 2010, 2013 and 2016), and finally MAPI (Messaging Application Programming Interface) over HTTP (which is yet another improvement over the previous technologies, and supported only by 2013 and 2016). The later verson will require a specific Outlook that supports it, but there is a means by which you can use both Outlook Anywhere and MAPI over HTTP with custom user specific settings. Both of the later versions are also secured using certificates.
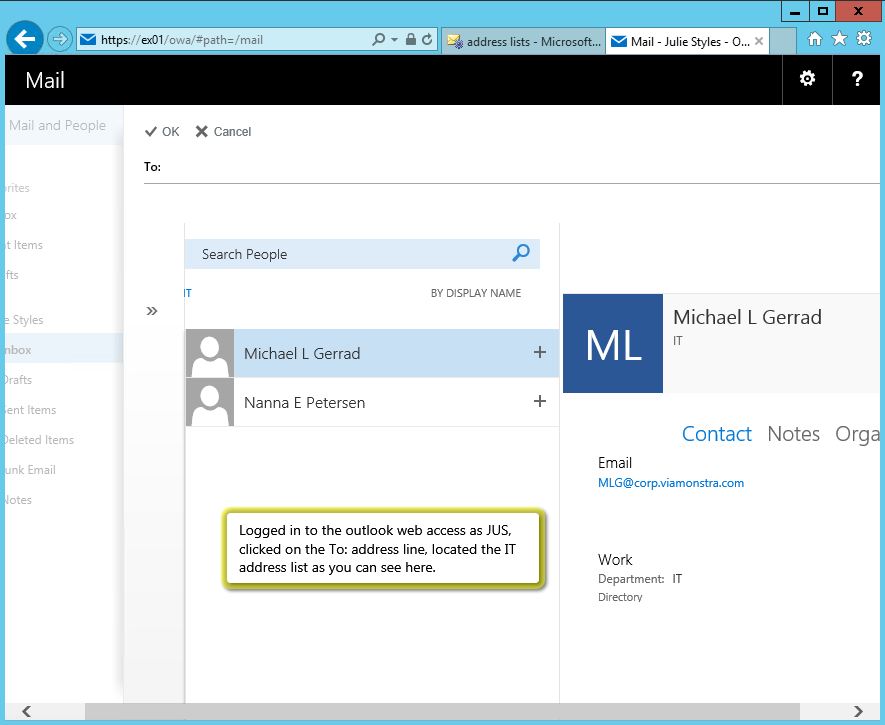
Address lists are specfic groups of email users that can be seen and used within Outlook to make it much easier to send to a group of people with a single reference to just the group vs. to each individual user address.
Your task after viewing this video is to do the following:
- Modify the Department property of the users in your ViaMonstra\Users OU by assigning the users to 3 different departments of your choosing. Hint: you can change the department on multiple users at one time by selecting a group of users and then by selecting Properties.
- Create address lists specific to each of the departments that you created. Use the name of the department to name the address list. Include mailbox users and departments specific to the address list. Use the PowerShell cmdlet new-addresslist from the Exchange PowerShell to perform this task.
- Update the address lists as shown in the video.
- Open the browser based Outlook and view these address lists.
Order and install certificates. Lynda.com link. (Review only)
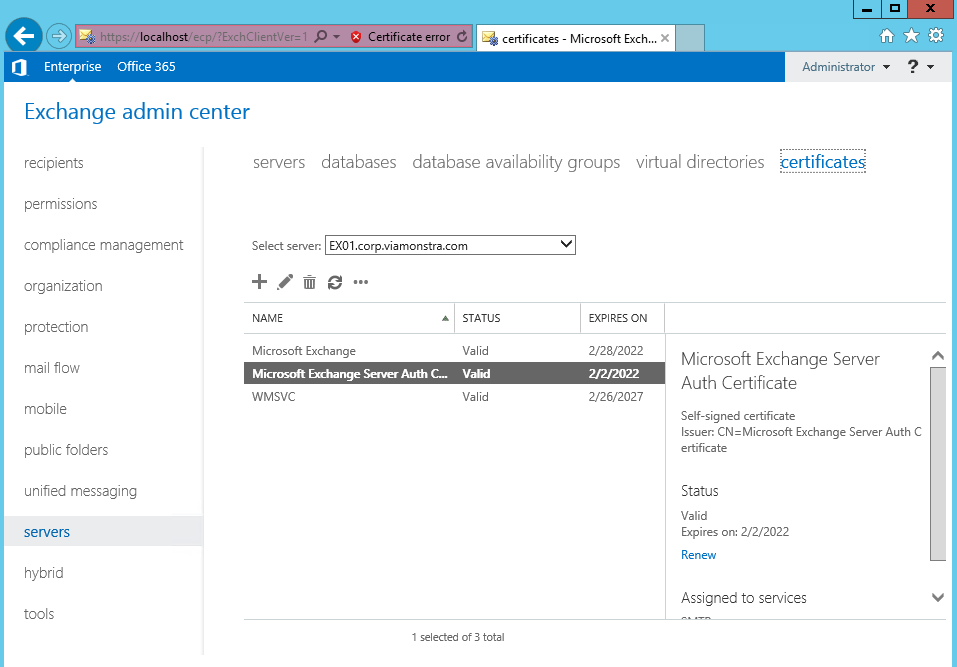
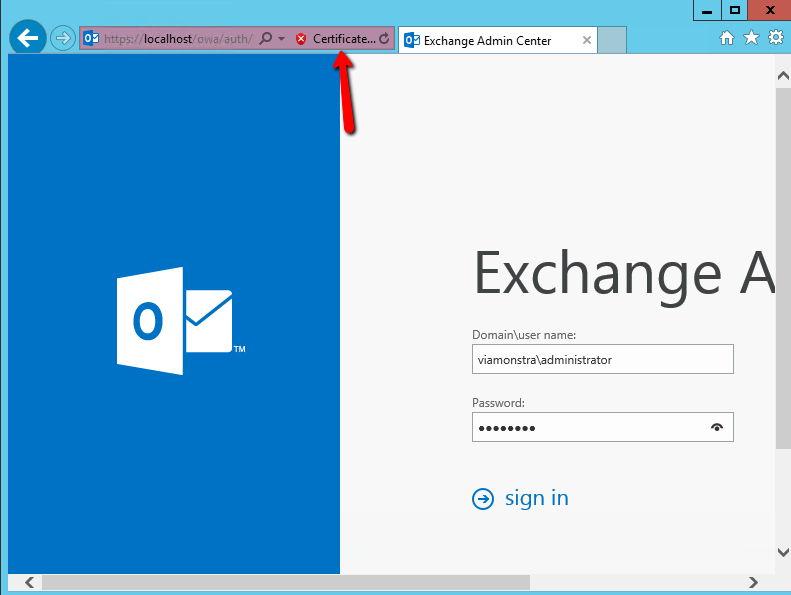
Microsoft Exchange Server uses Secure Sockets Layer (SSL) to encrypt the network traffic between the server, clients, and applications. Whenever you are prompted to login, SSL is needed to secure this transaction. When Exchange Server 2016 is first installed it generates a self-signed SSL certificate that is then enabled for IIS (HTTPS services like Outlook Web Access (OWA), Exchange Web Services (EWS) and ActiveSync which is used by mobile devices), Simple Mail Transport Protocol (SMTP), Post Office Protocol (POP), and Internet Message Access Protocol (IMAP). You may recall the warning that you get when you access the web administration tool, this indicates that the certicate is not trusted, this is true because it is self-signed. The self-signed certicate is meant to be used temporarily until you purchase a 3rd-Party trusted certificate from places like GoDaddy, DigiCert, etc. We will not be purchasing a certificate for this lab, therefore will will use the default, self-signed certificate and thus tolerate the Certificate error shown in the image below.
Configure authentication methods. Lynda.com link.
This video reviews the supported authentication types. We will use the defaults for now.
Plan the namespace model.
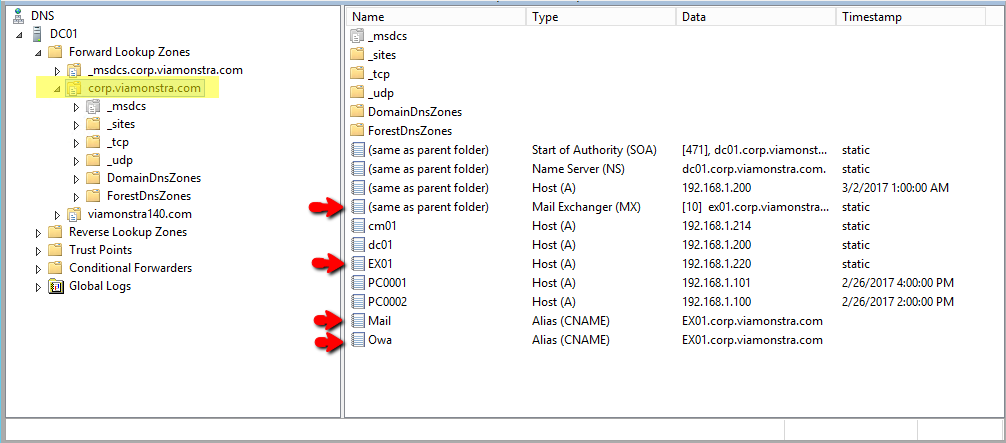
A namespace represents the domain naming heirarchy. The namespace used by Exchange Server 2016 utilizes just one domain name versus a more complex namespace heirachy used by prevoius Exchange servers. The namespace that I had established is defined in both DNS and within Exchange.
Configure your DNS to match the following settings:
Configure Exchange to match the following settings:
- From Exchange admin center, select Server -> virtual directories.
- For the following virtual directories, define the Internal URL to be as shown below:
- ecp (Default Web Site)
Internal URL: https://owa.corp.viamonstra.com/ecp
- EWS (Default Web Site)
Internal URL: https://mail.corp.viamonstra.com/EWS/Exchange.asmx
- Microsoft-Server-ActiveSync (Default Web Site)
Internal URL: https://mail.corp.viamonstra.com/Microsoft-Server-ActiveSync
- OAB (Default Web Site)
Internal URL: https://mail.corp.viamonstra.com/OAB
- owa (Default Web Site)
Internal URL: https://owa.corp.viamonstra.com/owa
- PowerShell (Default Web Site)
Internal URL: https://mail.corp.viamonstra.com/PowerShell
Configure DNS references on clients and servers.
I had a few connectivity problems between the client and Exchange server. Based on the research that I had found I had to make a number of changes to make it work. Here they are:
- Change your DHCP scope to only reference one DNS server and have this DNS server be your Domain Controller. Once this is done, update your client using ipconfig/renew.
- From Exchange admin center, open Servers and then edit EX01.
- Select DNS lookups and then create a custom setting to reference your internal DNS server's address to both the Internal and External DNS lookups.
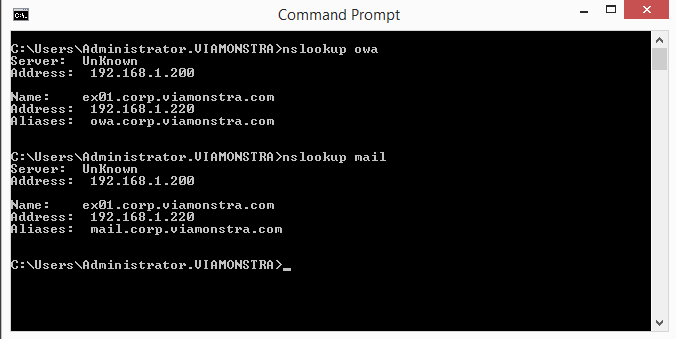
- Test DNS from your client as follows:
- nslookup mail
- nslookup owa
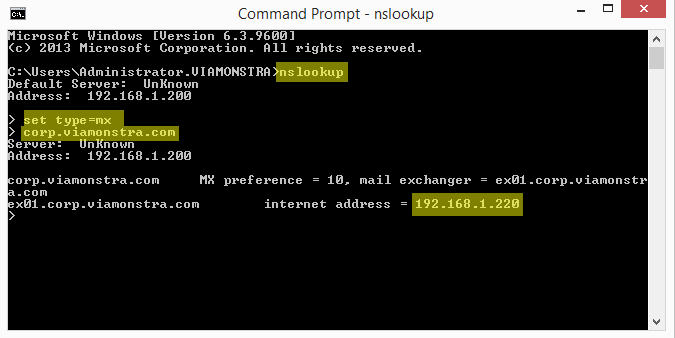
set type = mx
corp.viamonstra.com
Configure the scope on the Default Frontend EX01
- Open Exchange admin center, open mail flow, select receive connectors.
- From the receive connectors interface, double-click Default Frontend EX01 (this is the SMTP, port 25 frontend)
- Select scoping.
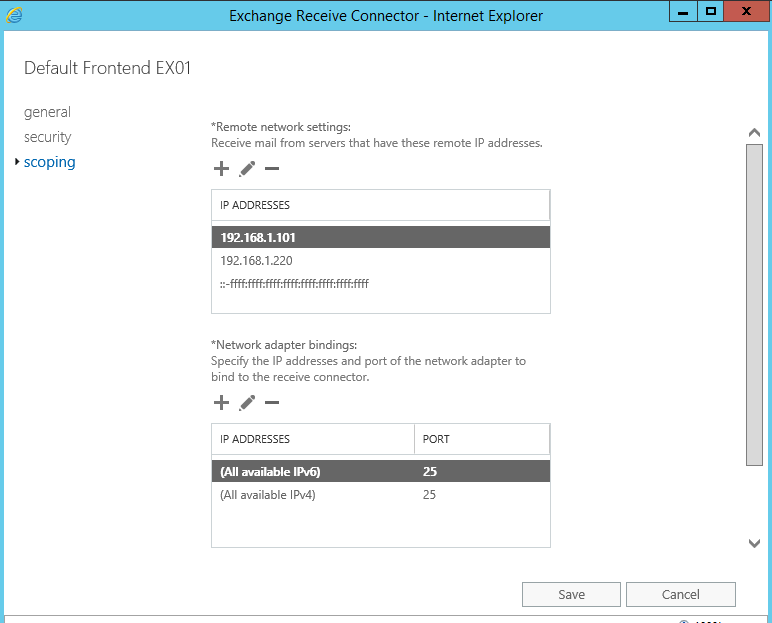
- Within the Remote network settings window, overwrite the default IP addresses range 0.0.0.0-255.255.255.255 to the addresses of your servers and clients. The image below represents my PC001 virutal machine (192.168.1.101) and my Exchange server (192.168.1.220). You should add the remaining IP addresses of your network. The reason for this change is to fix a known problem in Exchange 2013, which also seems to exist in Exchange 2016. Without making this change I was not able to send internal emails or successfully test the SMTP connection from the client computer. I am not sure of any other work around at this time.
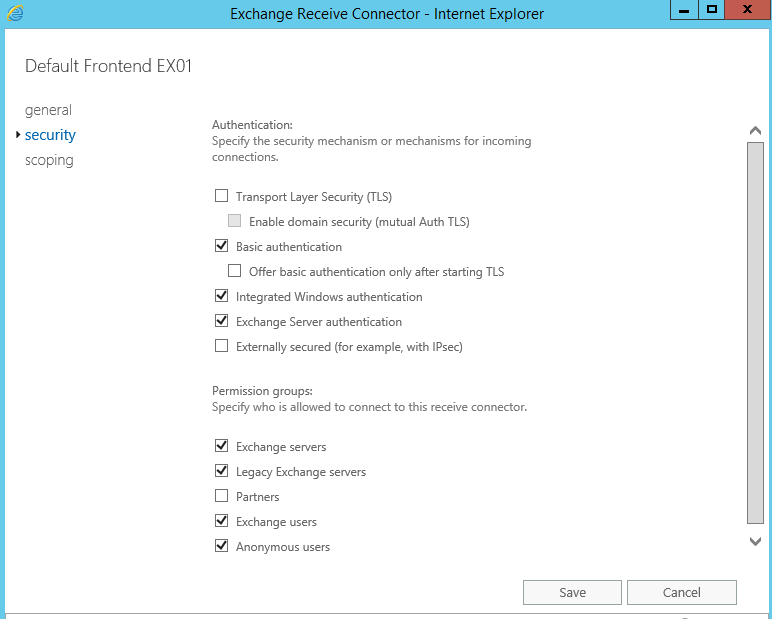
- Change the Default Frontend EX01 security settings to match the settings in the image below. Notice how I unchecked TLS and check Anonymous users. Note: this was one of the changes I made based on the recommended changes required to fix my connnectively problem. You might want to skip this step and make this change only to troubleshoot any connectivity you might have.
- After making the above change, restart the following two services (or reboot your EX01 server):
- Microsoft Frontend Transport
- Microsoft Exchange Transport
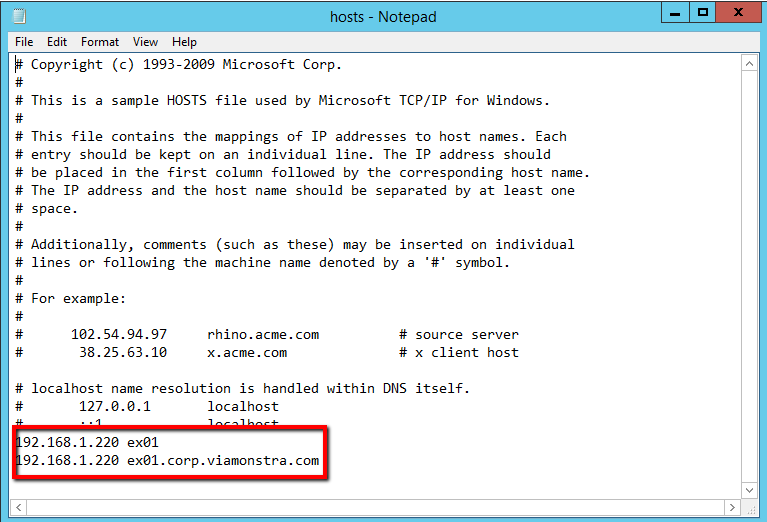
- Modify the hosts file on your Exhange server (c:\windows\system32\drivers\etc\hosts) to look like the image below. Again, this is a workaround.
Test your connectivity
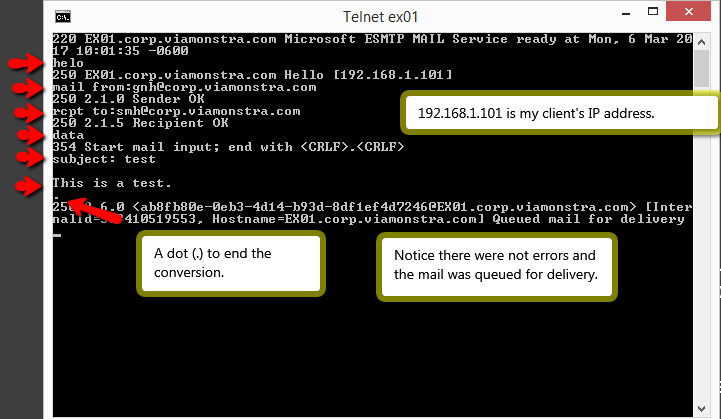
- From your client computer test your connectivity to your Exchange server by accessing port 25 from telnet by entering the following commands:
telnet ex01 25
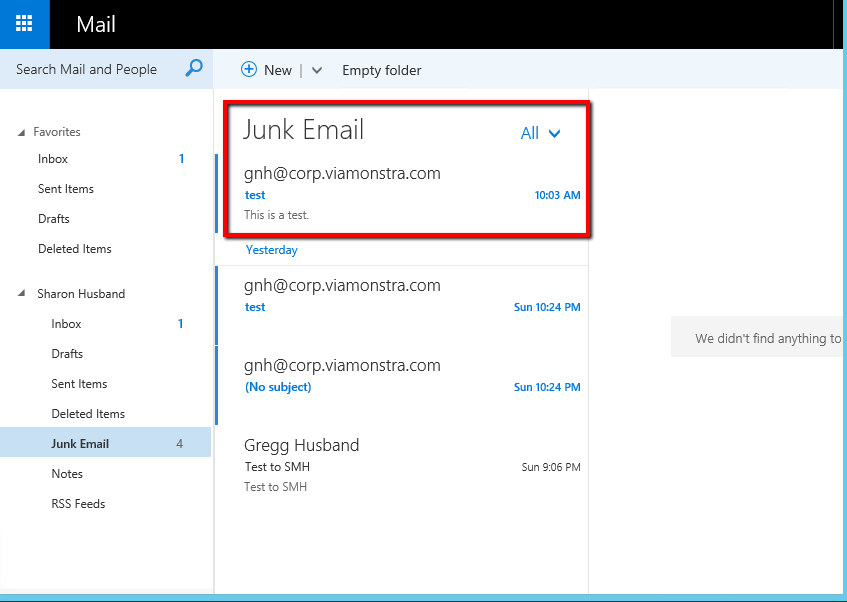
- From your client, open https://ex01/owa/ from your browser and then signin as the rcpt to: email that you used in the above test. Look in either your Inbox or Junk Email. See image below.
- If you are still having problems, here are a few other things that you can check.
- Make sure that your time zone and times are in sync between your client and server.
- Make sure that the recipients have the correct email address (name@corp.viamonstra.com).
Install and test Outlook 2016. Lynda.com link.
First, install Outlook 2016 by installing Office 365 onto your PC0001 virtual machine. You must login to Office 365 and install from there.
After you watch the video, demonstrate to me that you can successfully perform the following:
Test the endpoint protection alert.
During the Endpoint Protection lab you had created an alert email. With that email do the following:
- Create a mailbox for the alert email.
- Create an alert by attempting to download the test malware.
- Verify that the alert was transacted by looking at the appropriate log file.
- Login to PC0001 as the alert user and then open Outlook to see if the alert is in this user's inbox.
HINT: Remember, within the Email notification properties you can test the SMTP server. See page 390-391.